DIY Fall Mosaic Picture Craft (Easy Autumn Art Project)
This DIY fall mosaic picture craft is a fun and creative autumn art activity that encourages color exploration, creativity, and fine motor skill development. Using simple materials, children create a beautiful mosaic-style picture inspired by the colors and textures of fall.
This activity is perfect for kids and adults of any age as well as homeschool and at-home crafting during the fall season.
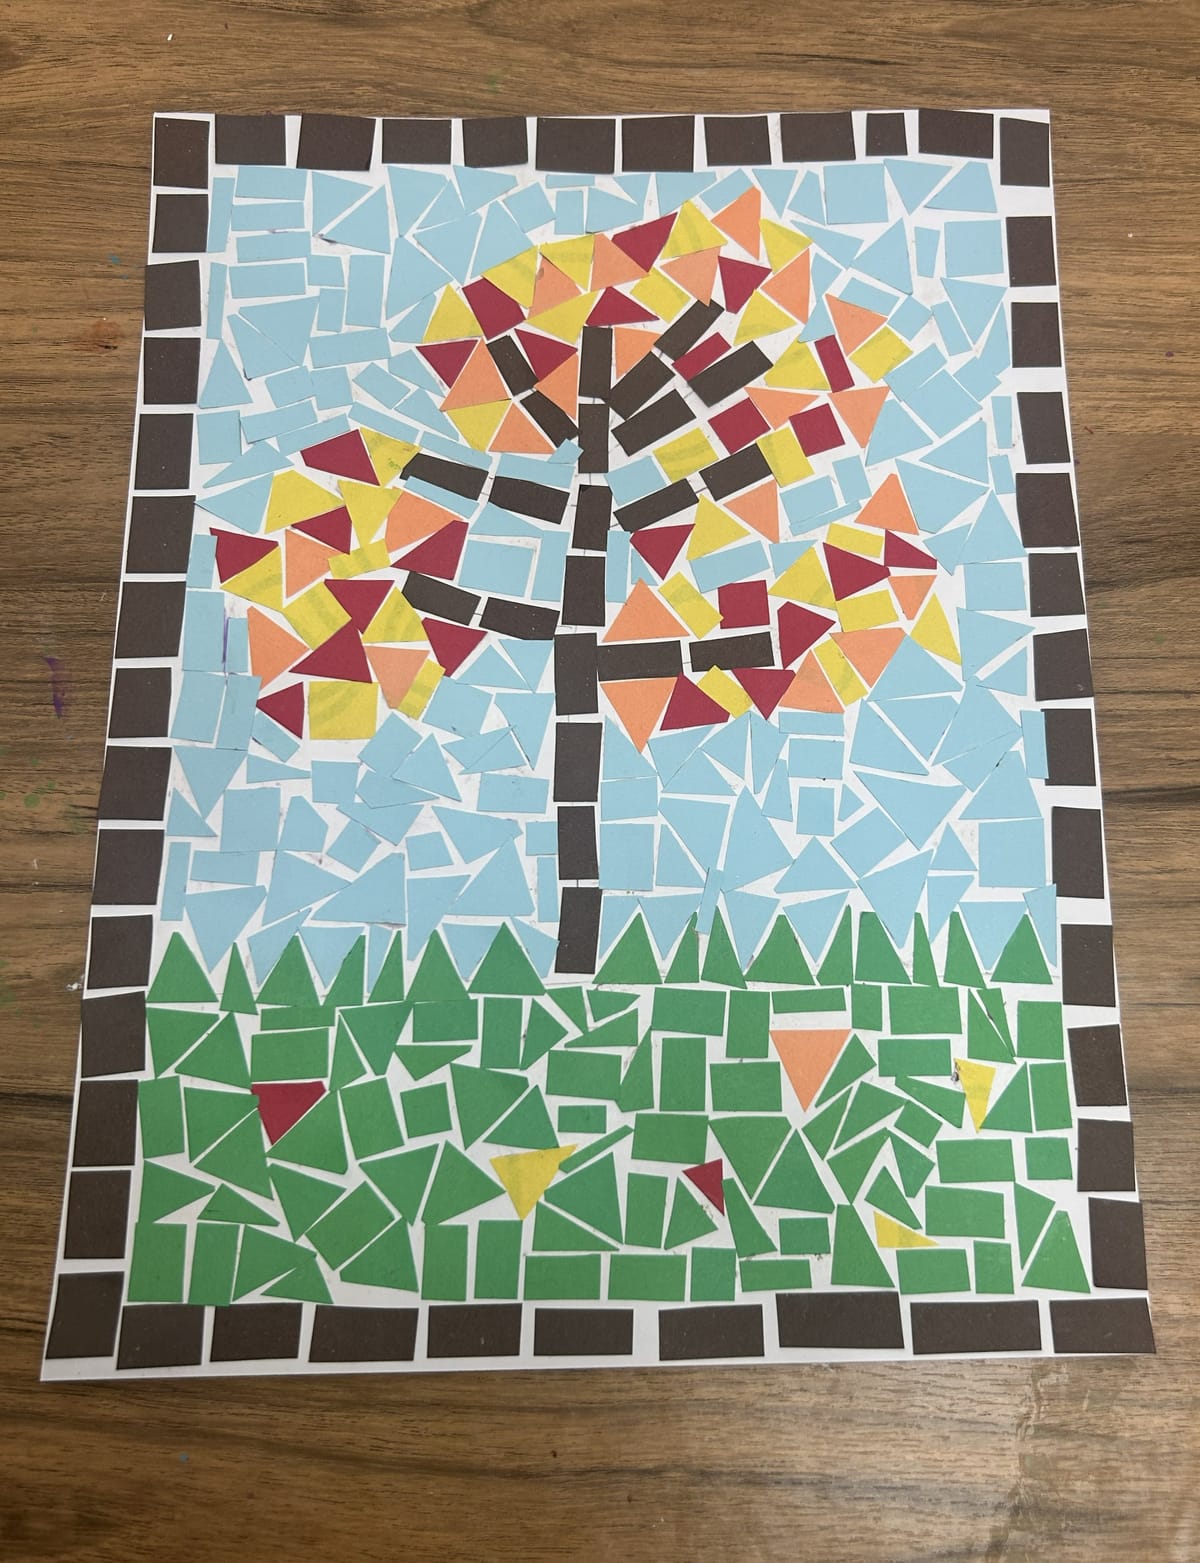
Mosaics are a decorated design that is made on top of a surface. This ancient art has been used as home decor for many years. Mosaics are many of small, similarly sized pieces and then are adhered on top of a prepare surface. This is a beautiful form of art. So, why not make your very own this fall with your child. Choose a fall design you would like to create, it can be as simple or challenging as you would like it to be.
Why You’ll Love This Fall Mosaic Craft
- 🍁 Simple and engaging fall art activity
- ✂️ Builds fine motor skills through cutting and gluing
- 🎨 Encourages creativity and color exploration
- 👧👦 Easy to adapt for different ages
- 📌 Perfect for classrooms, homeschool, or at home
Supplies Needed
- Construction paper or cardstock (fall colors)
- Scissors
- Glue stick or liquid glue
Step 1: Prepare Paper Pieces
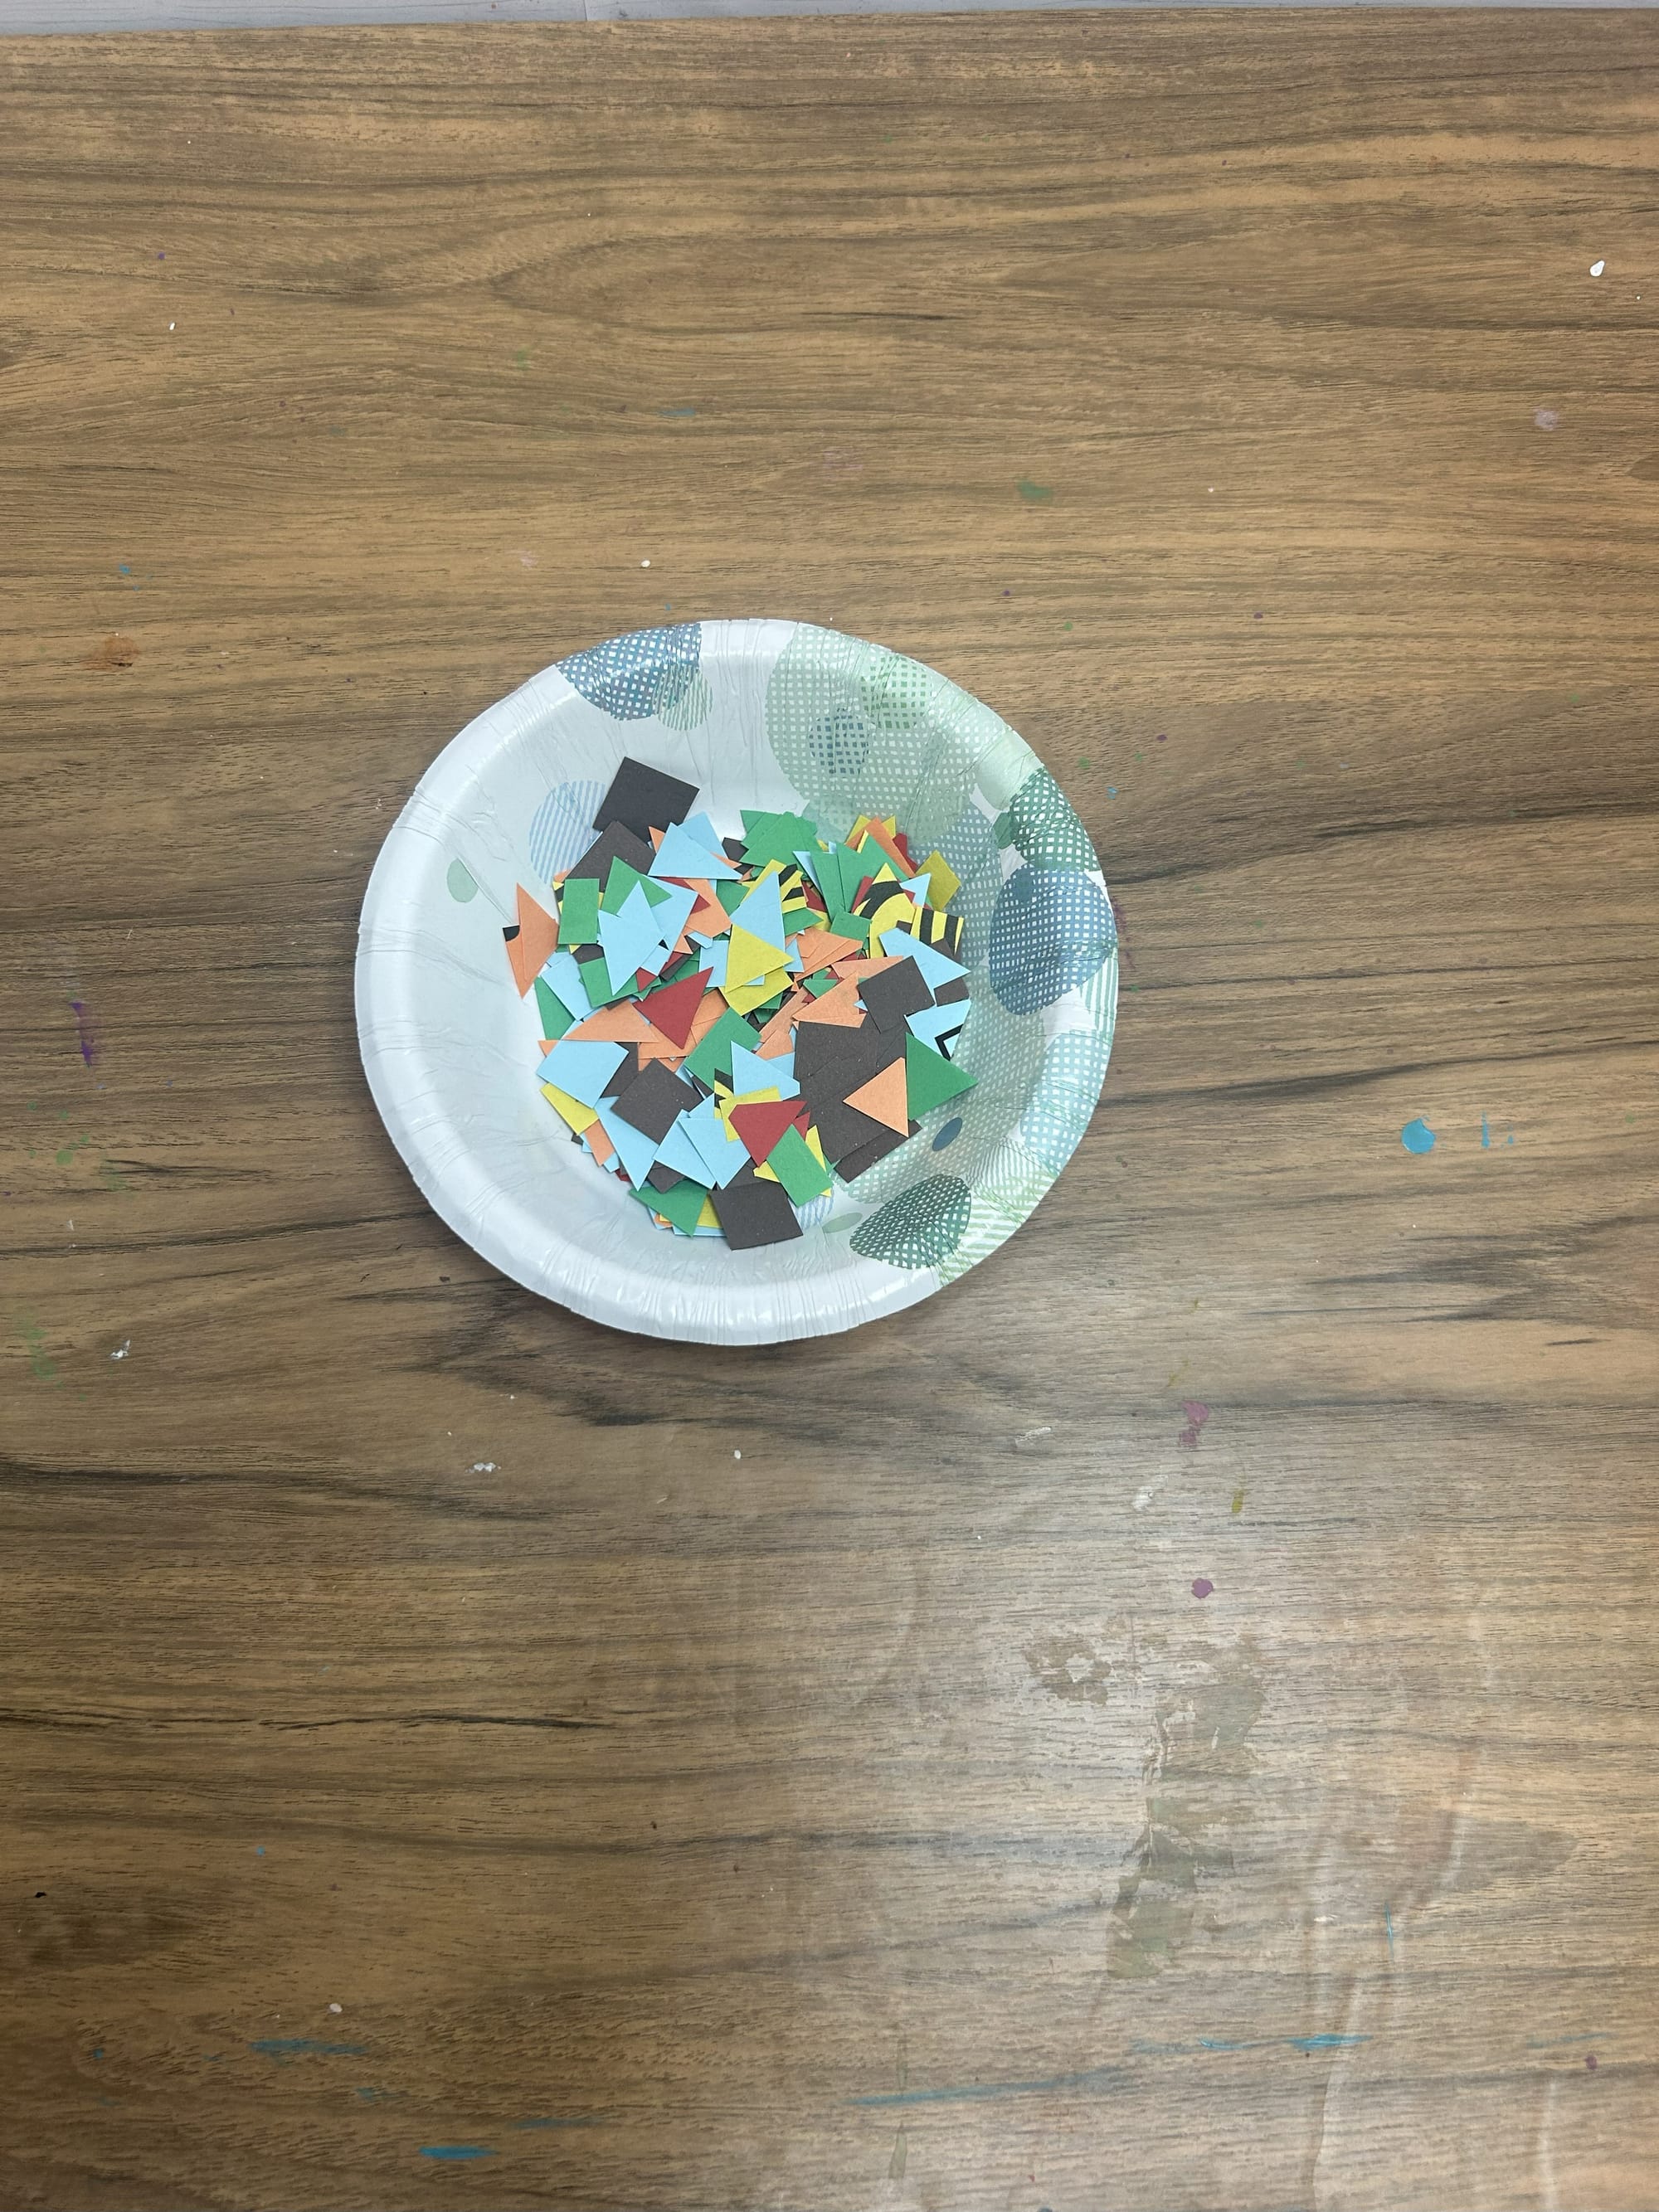
I chose to use scrap paper I had from other projects. Cut small shapes from your scraps into squares, rectangles and triangles. They can of course be cut later into any shape you need.
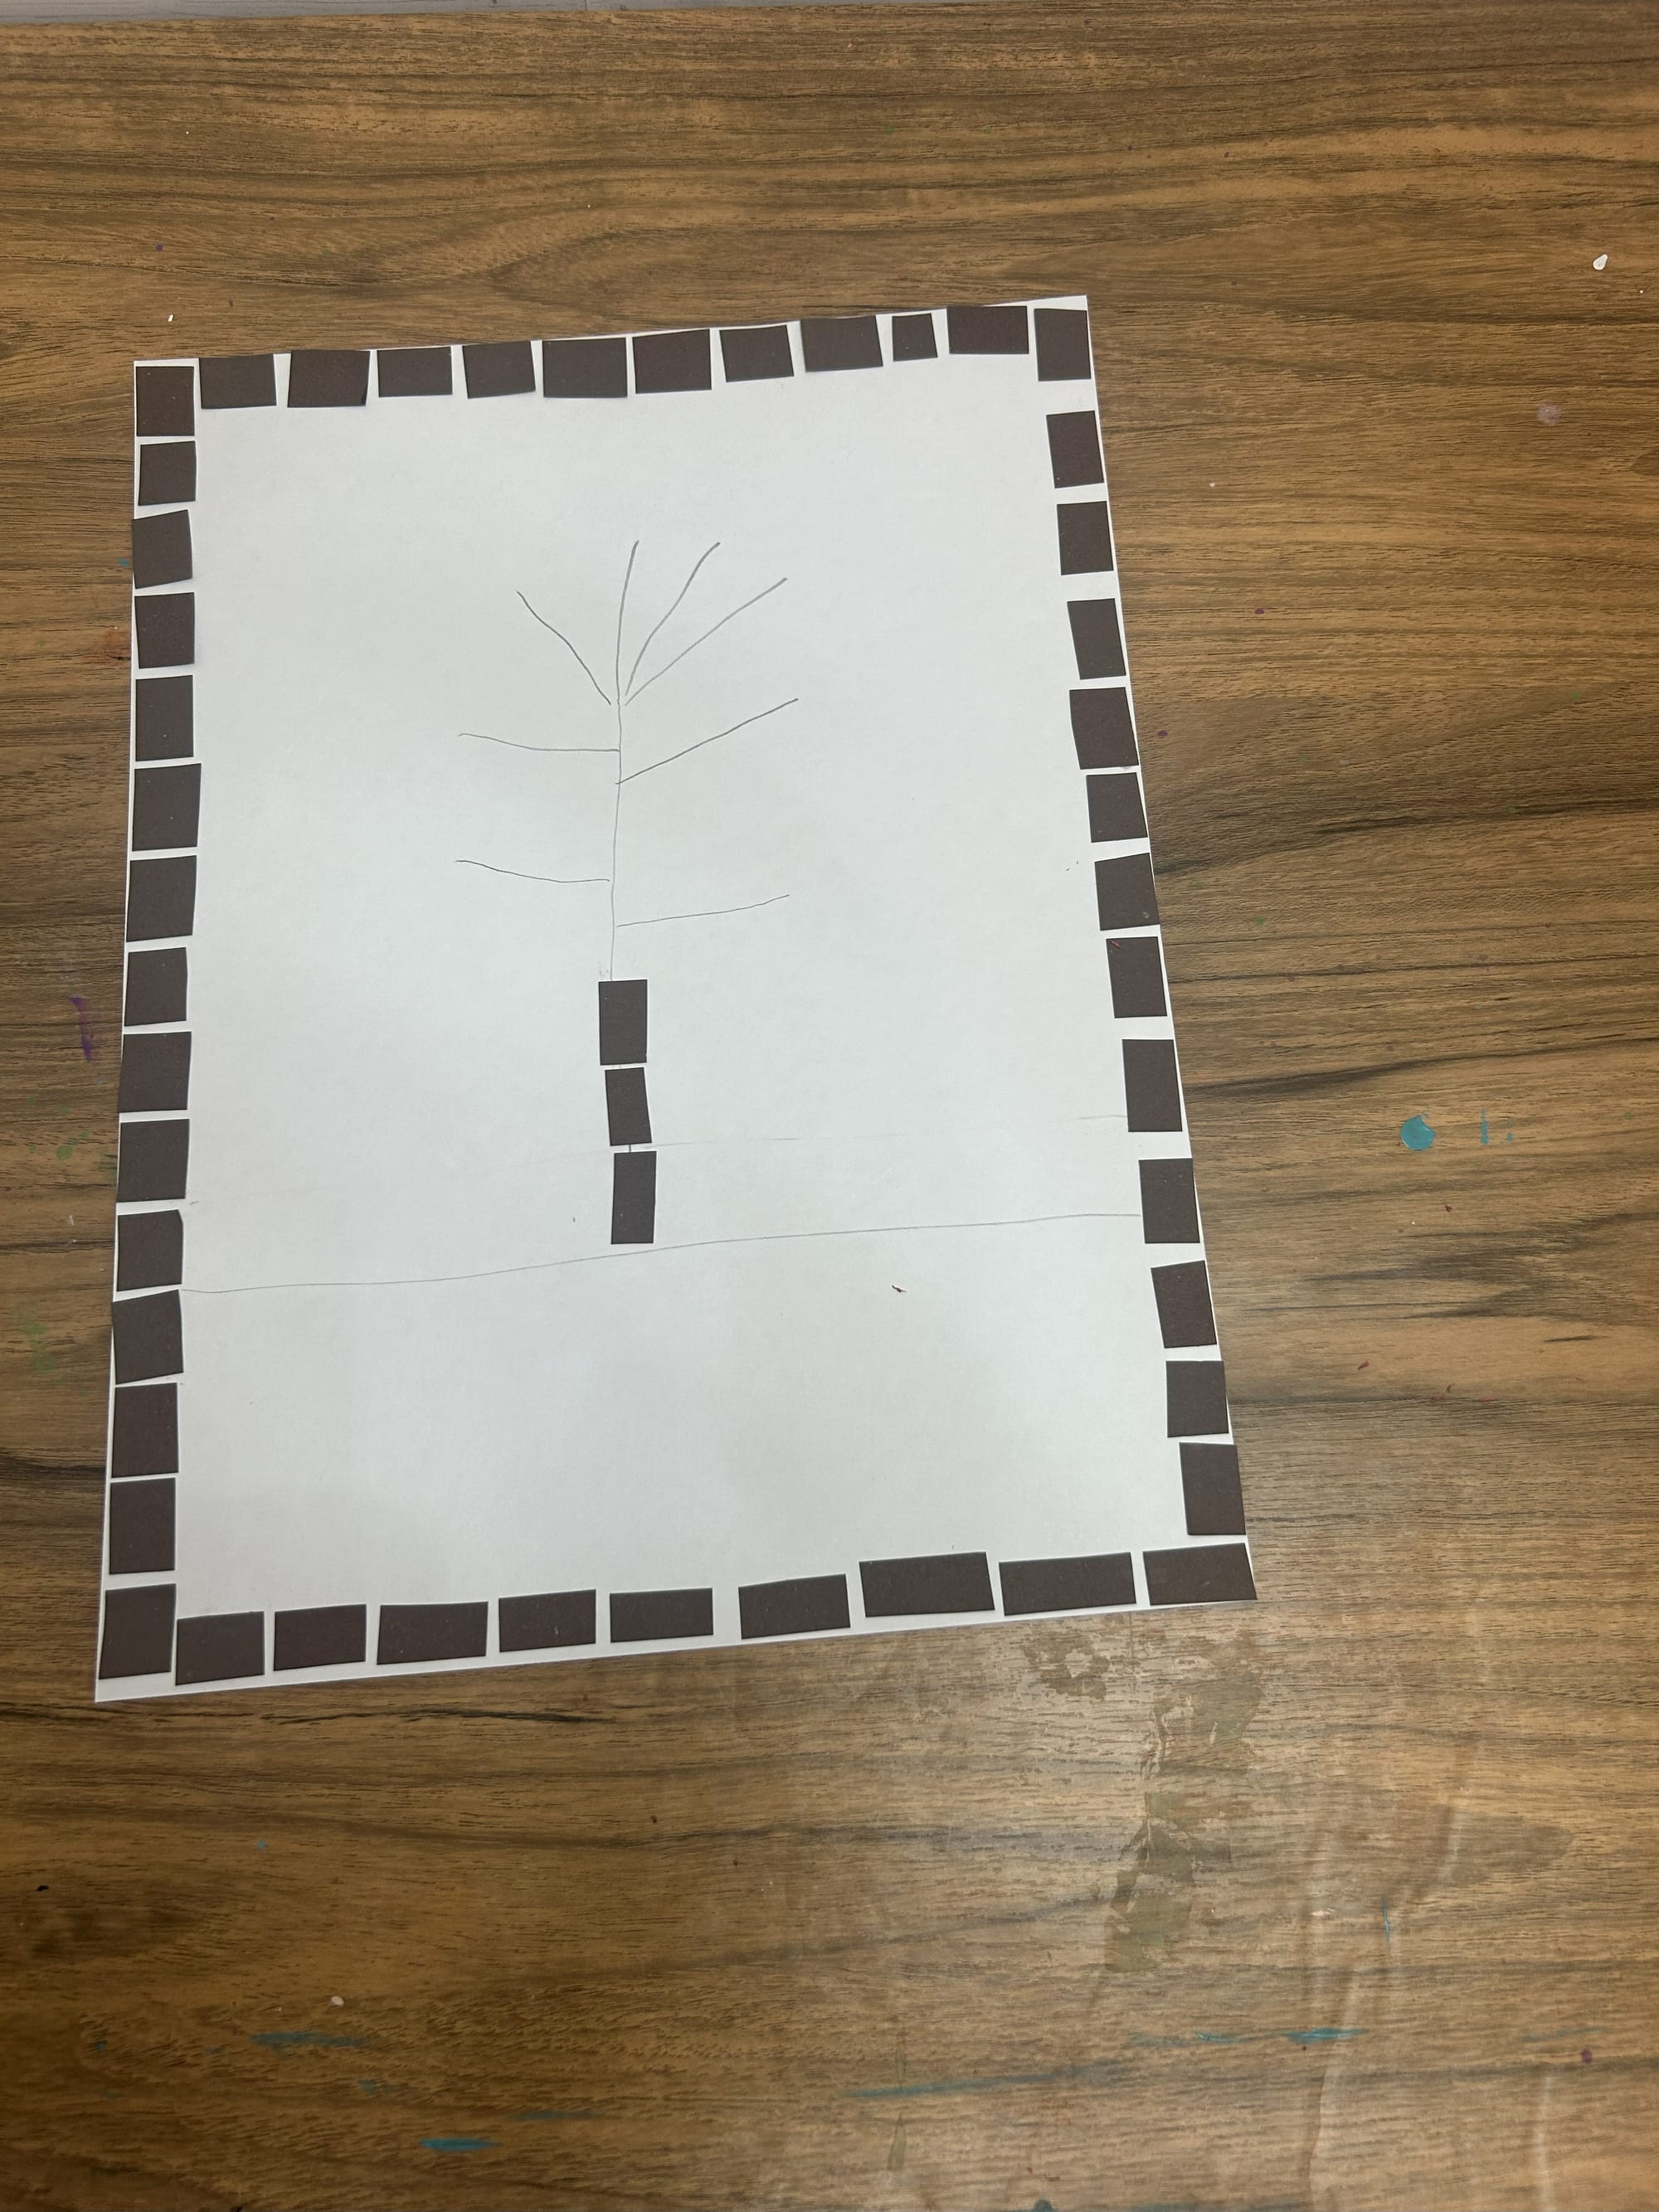
Step 2: Make a Frame
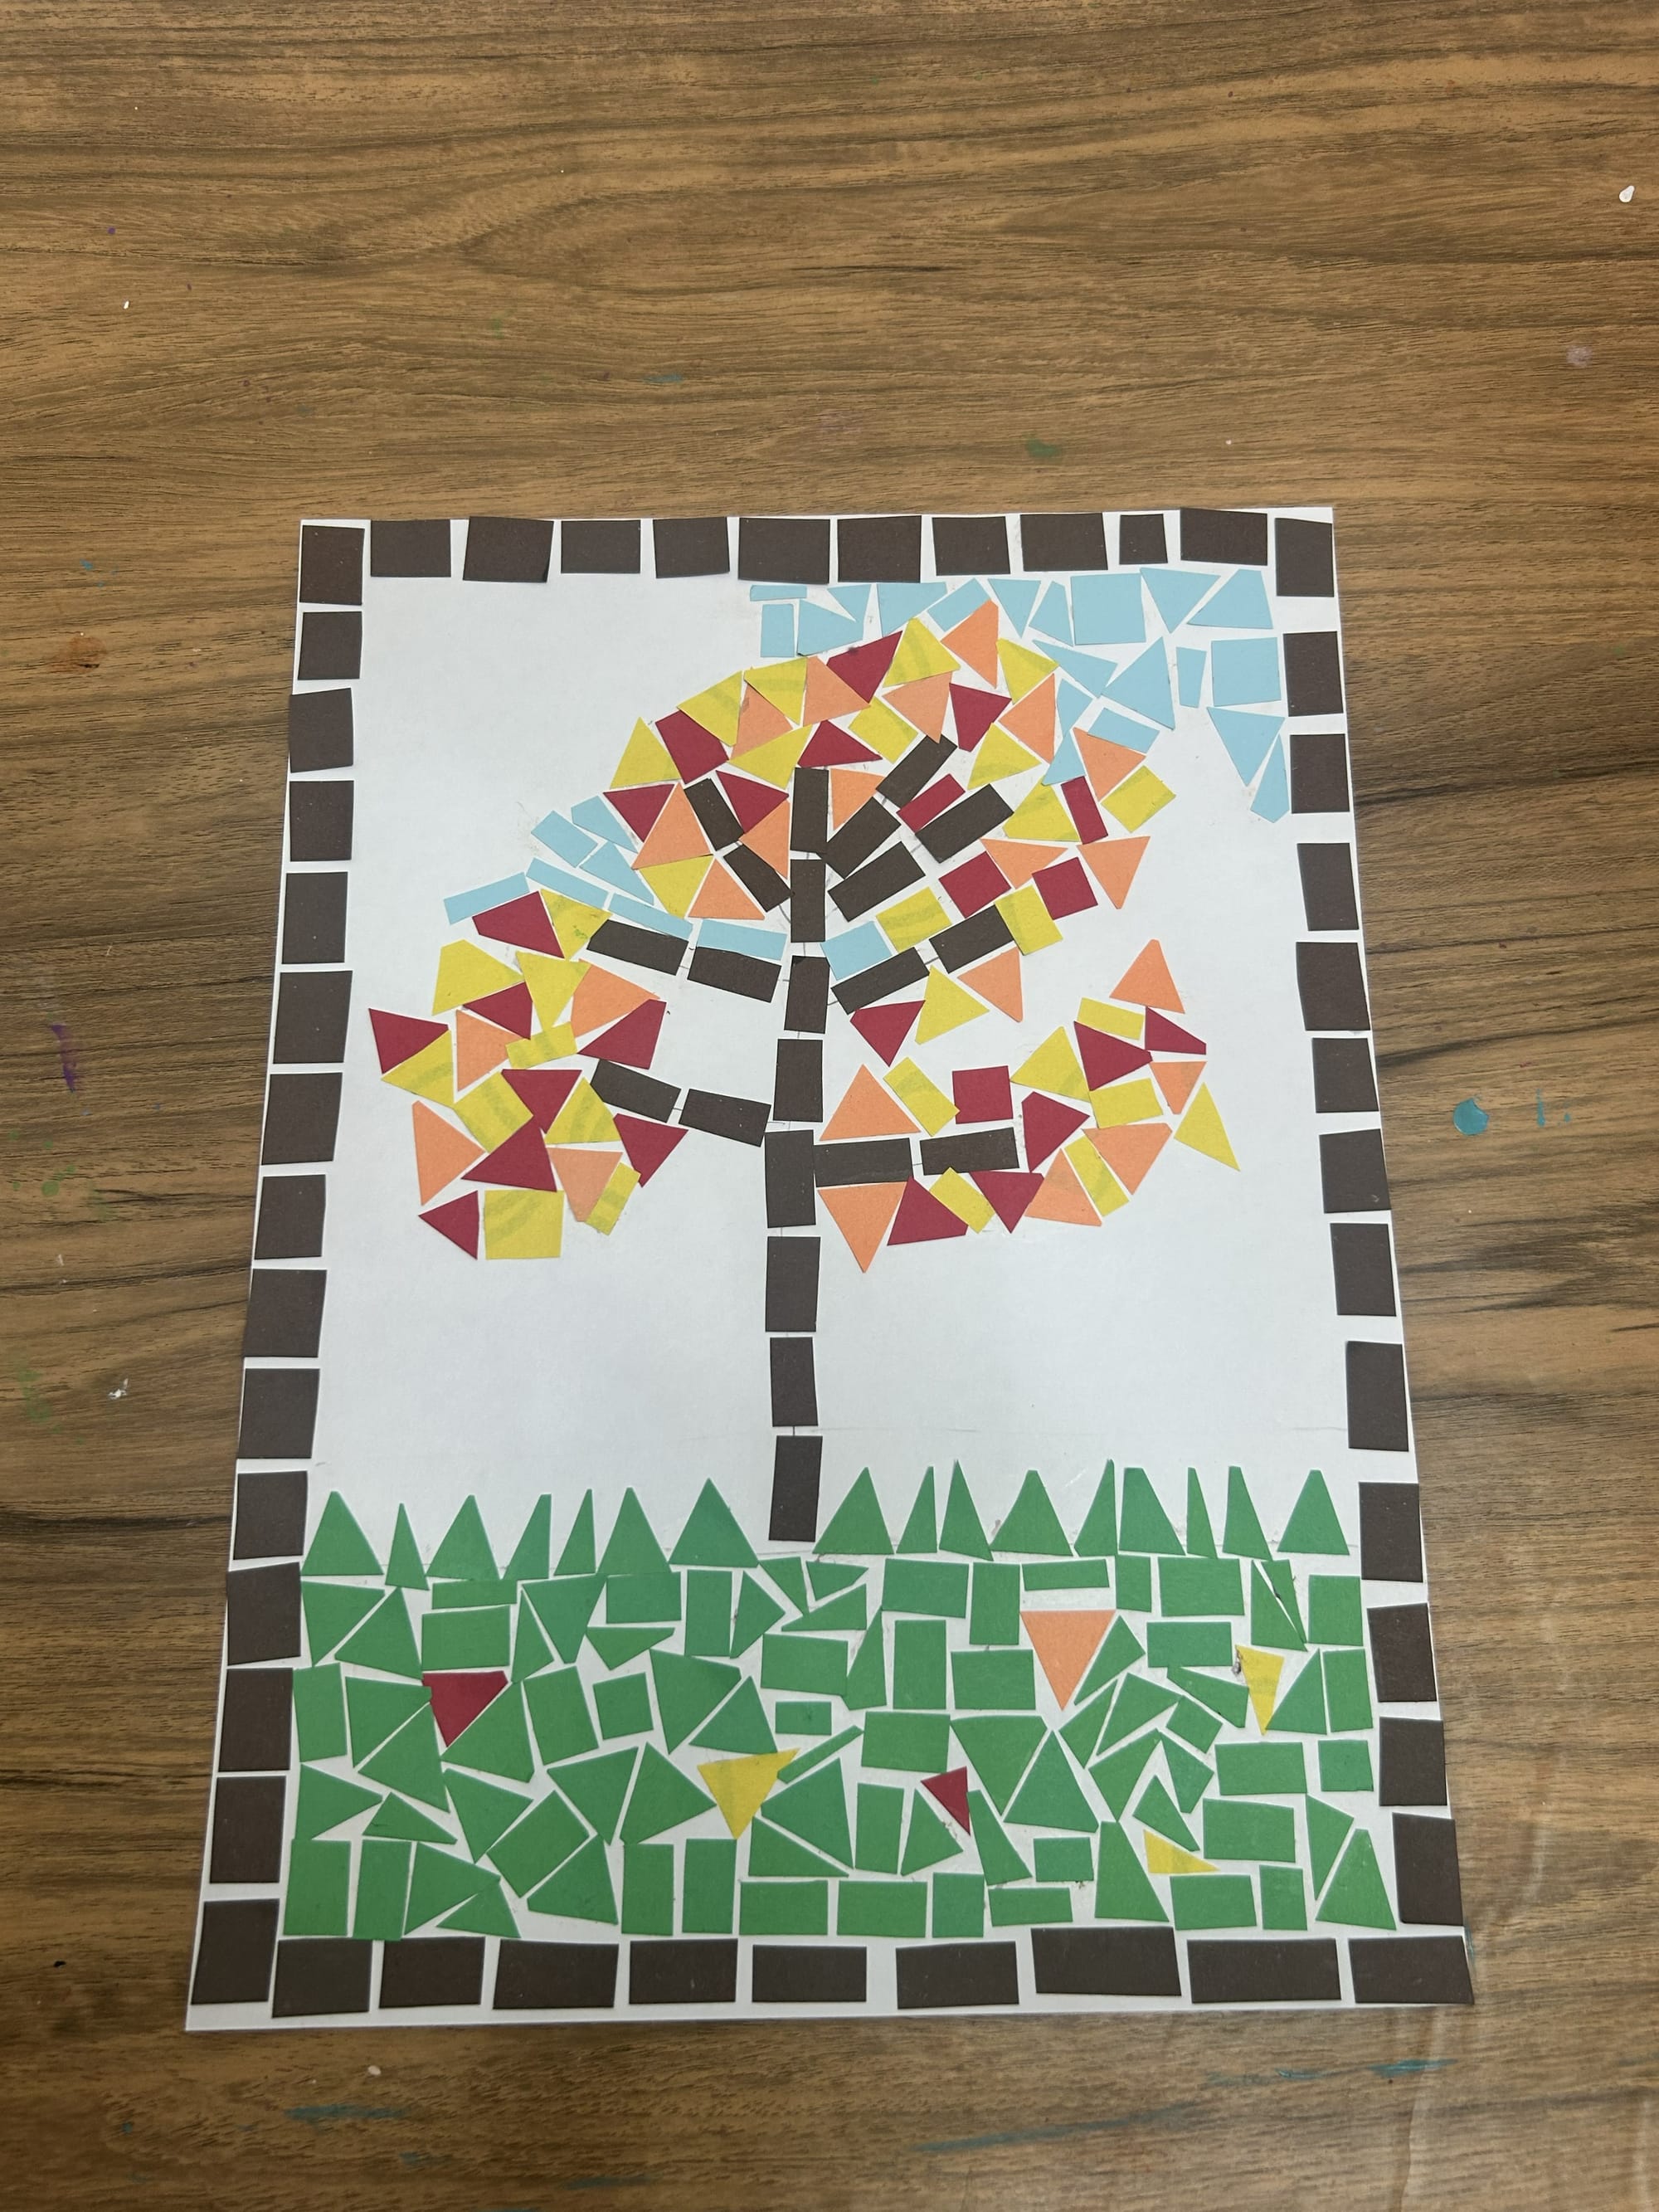
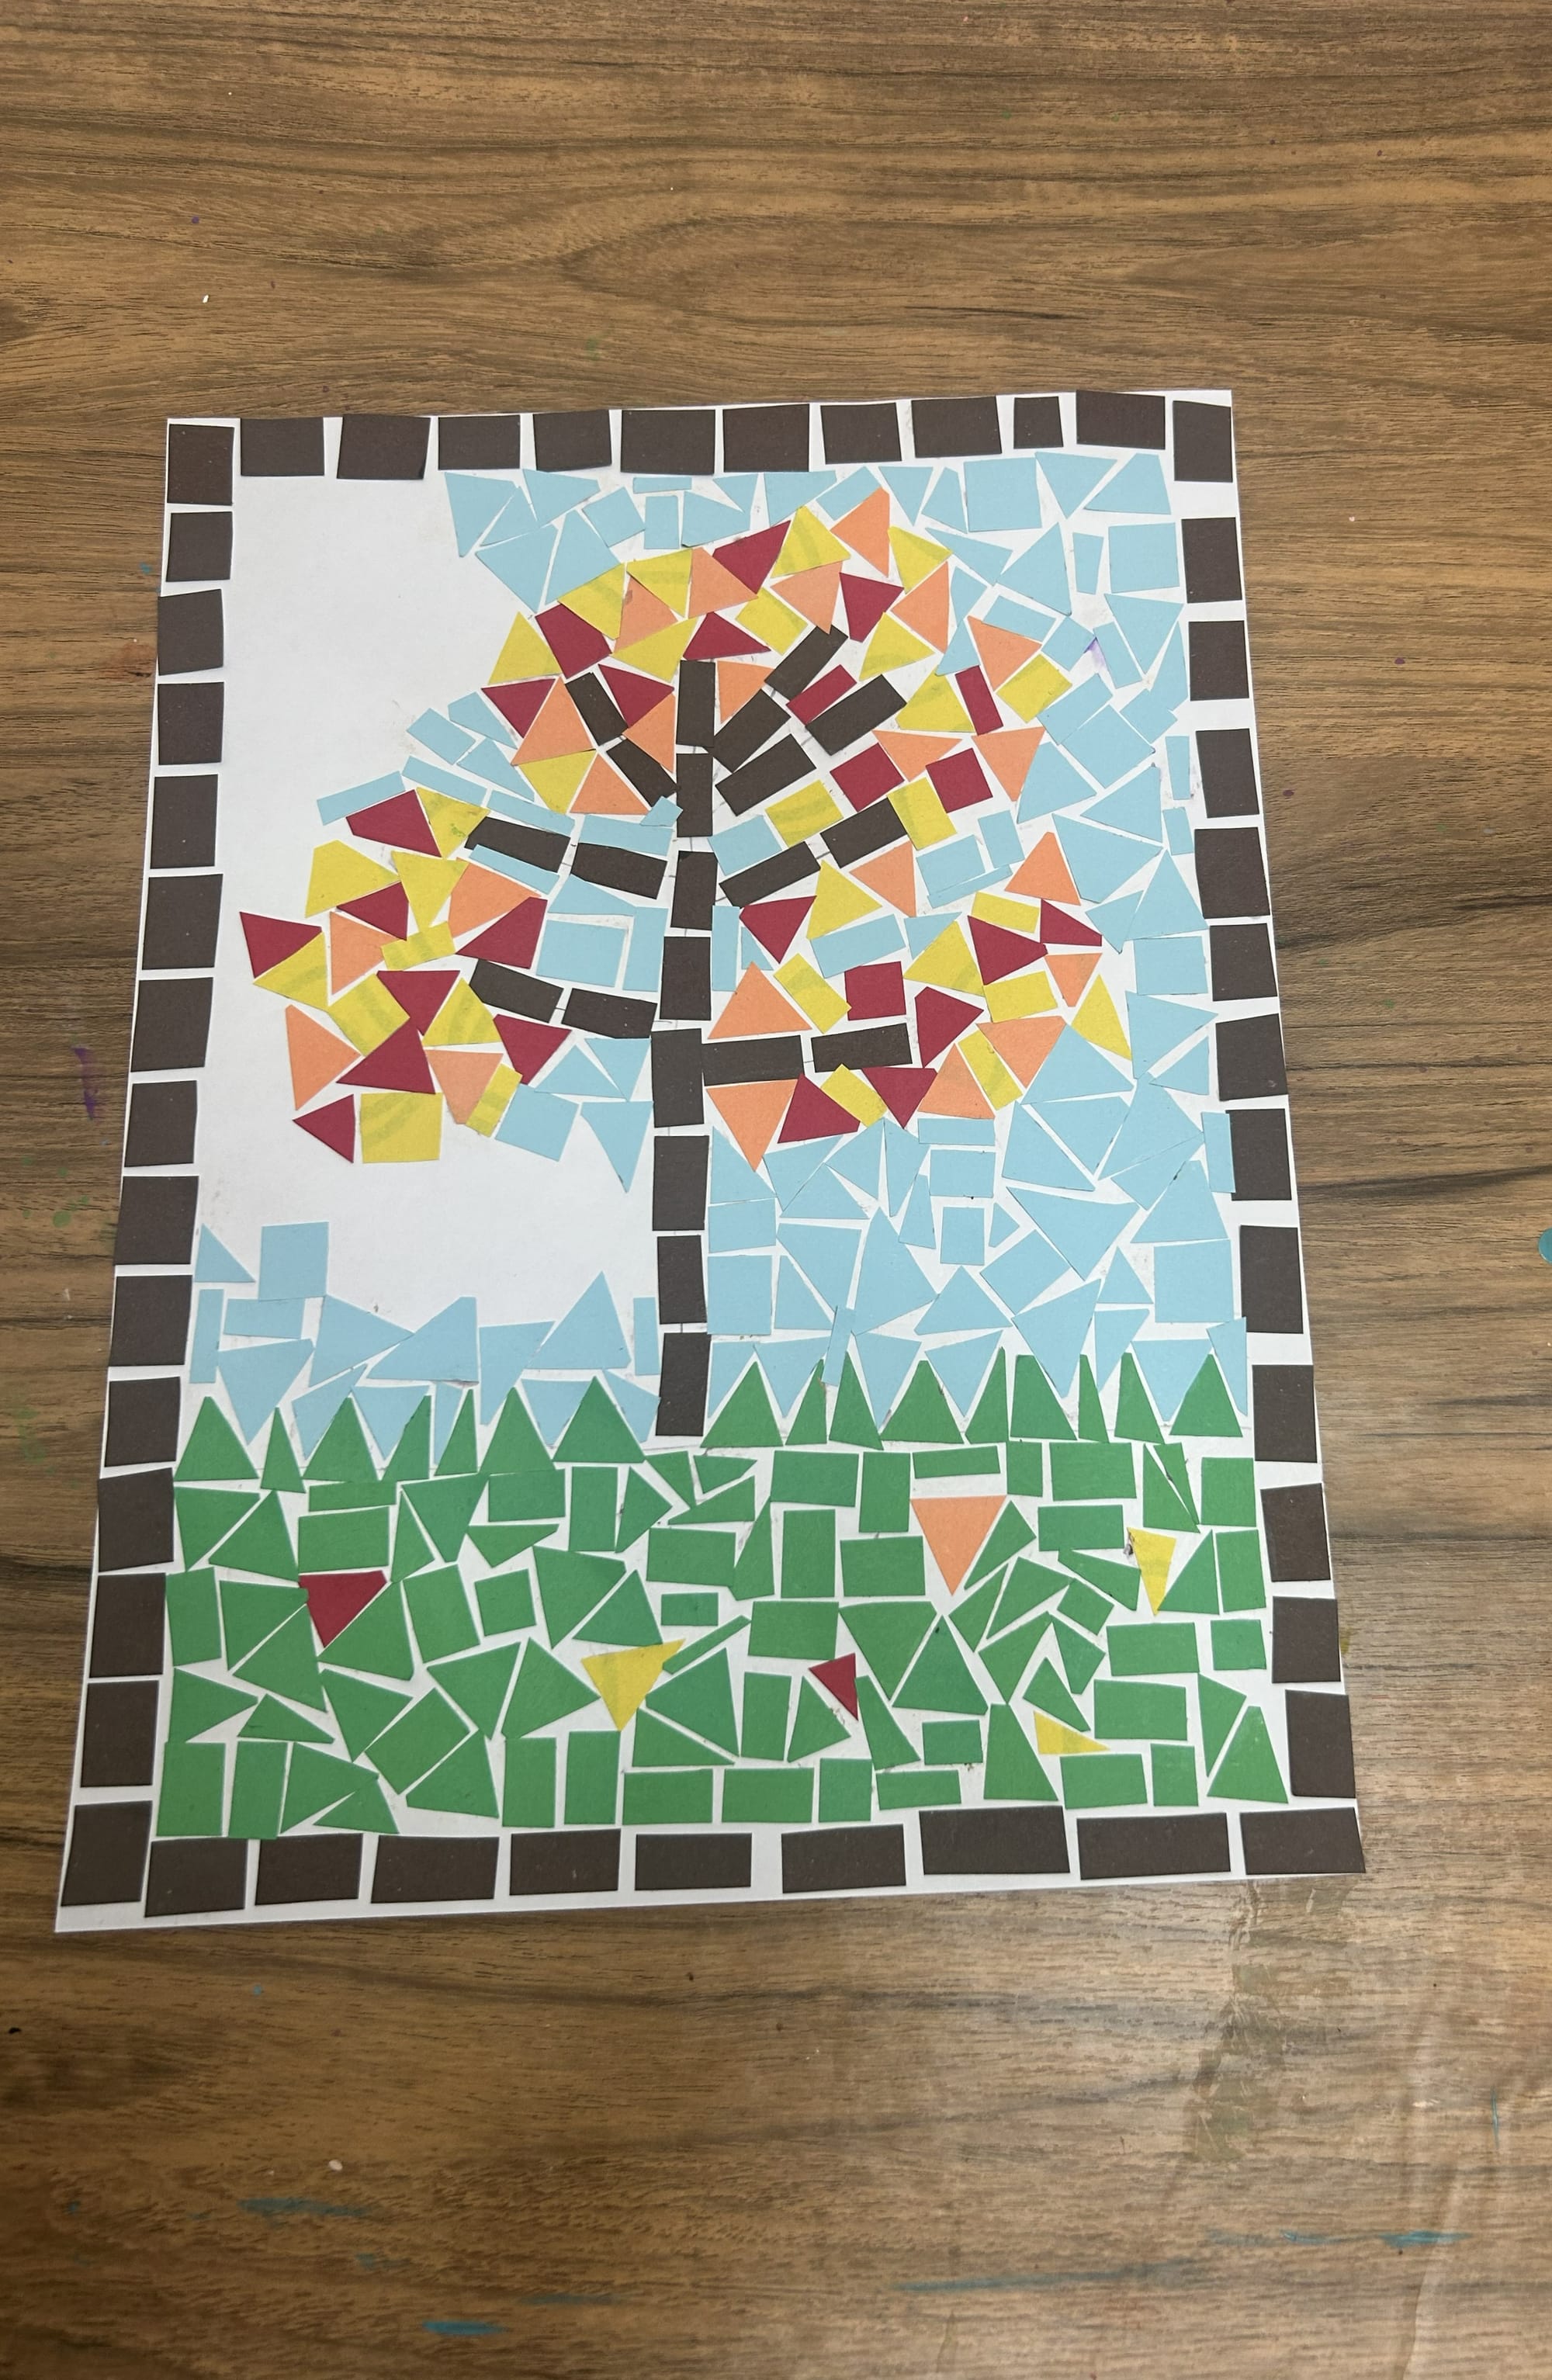
Use a piece of white construction paper or cardstock. Create a border around the outside of the paper. When placing the paper, leave small spaces in between each one. This will make it look like the grout on a real mosaic.
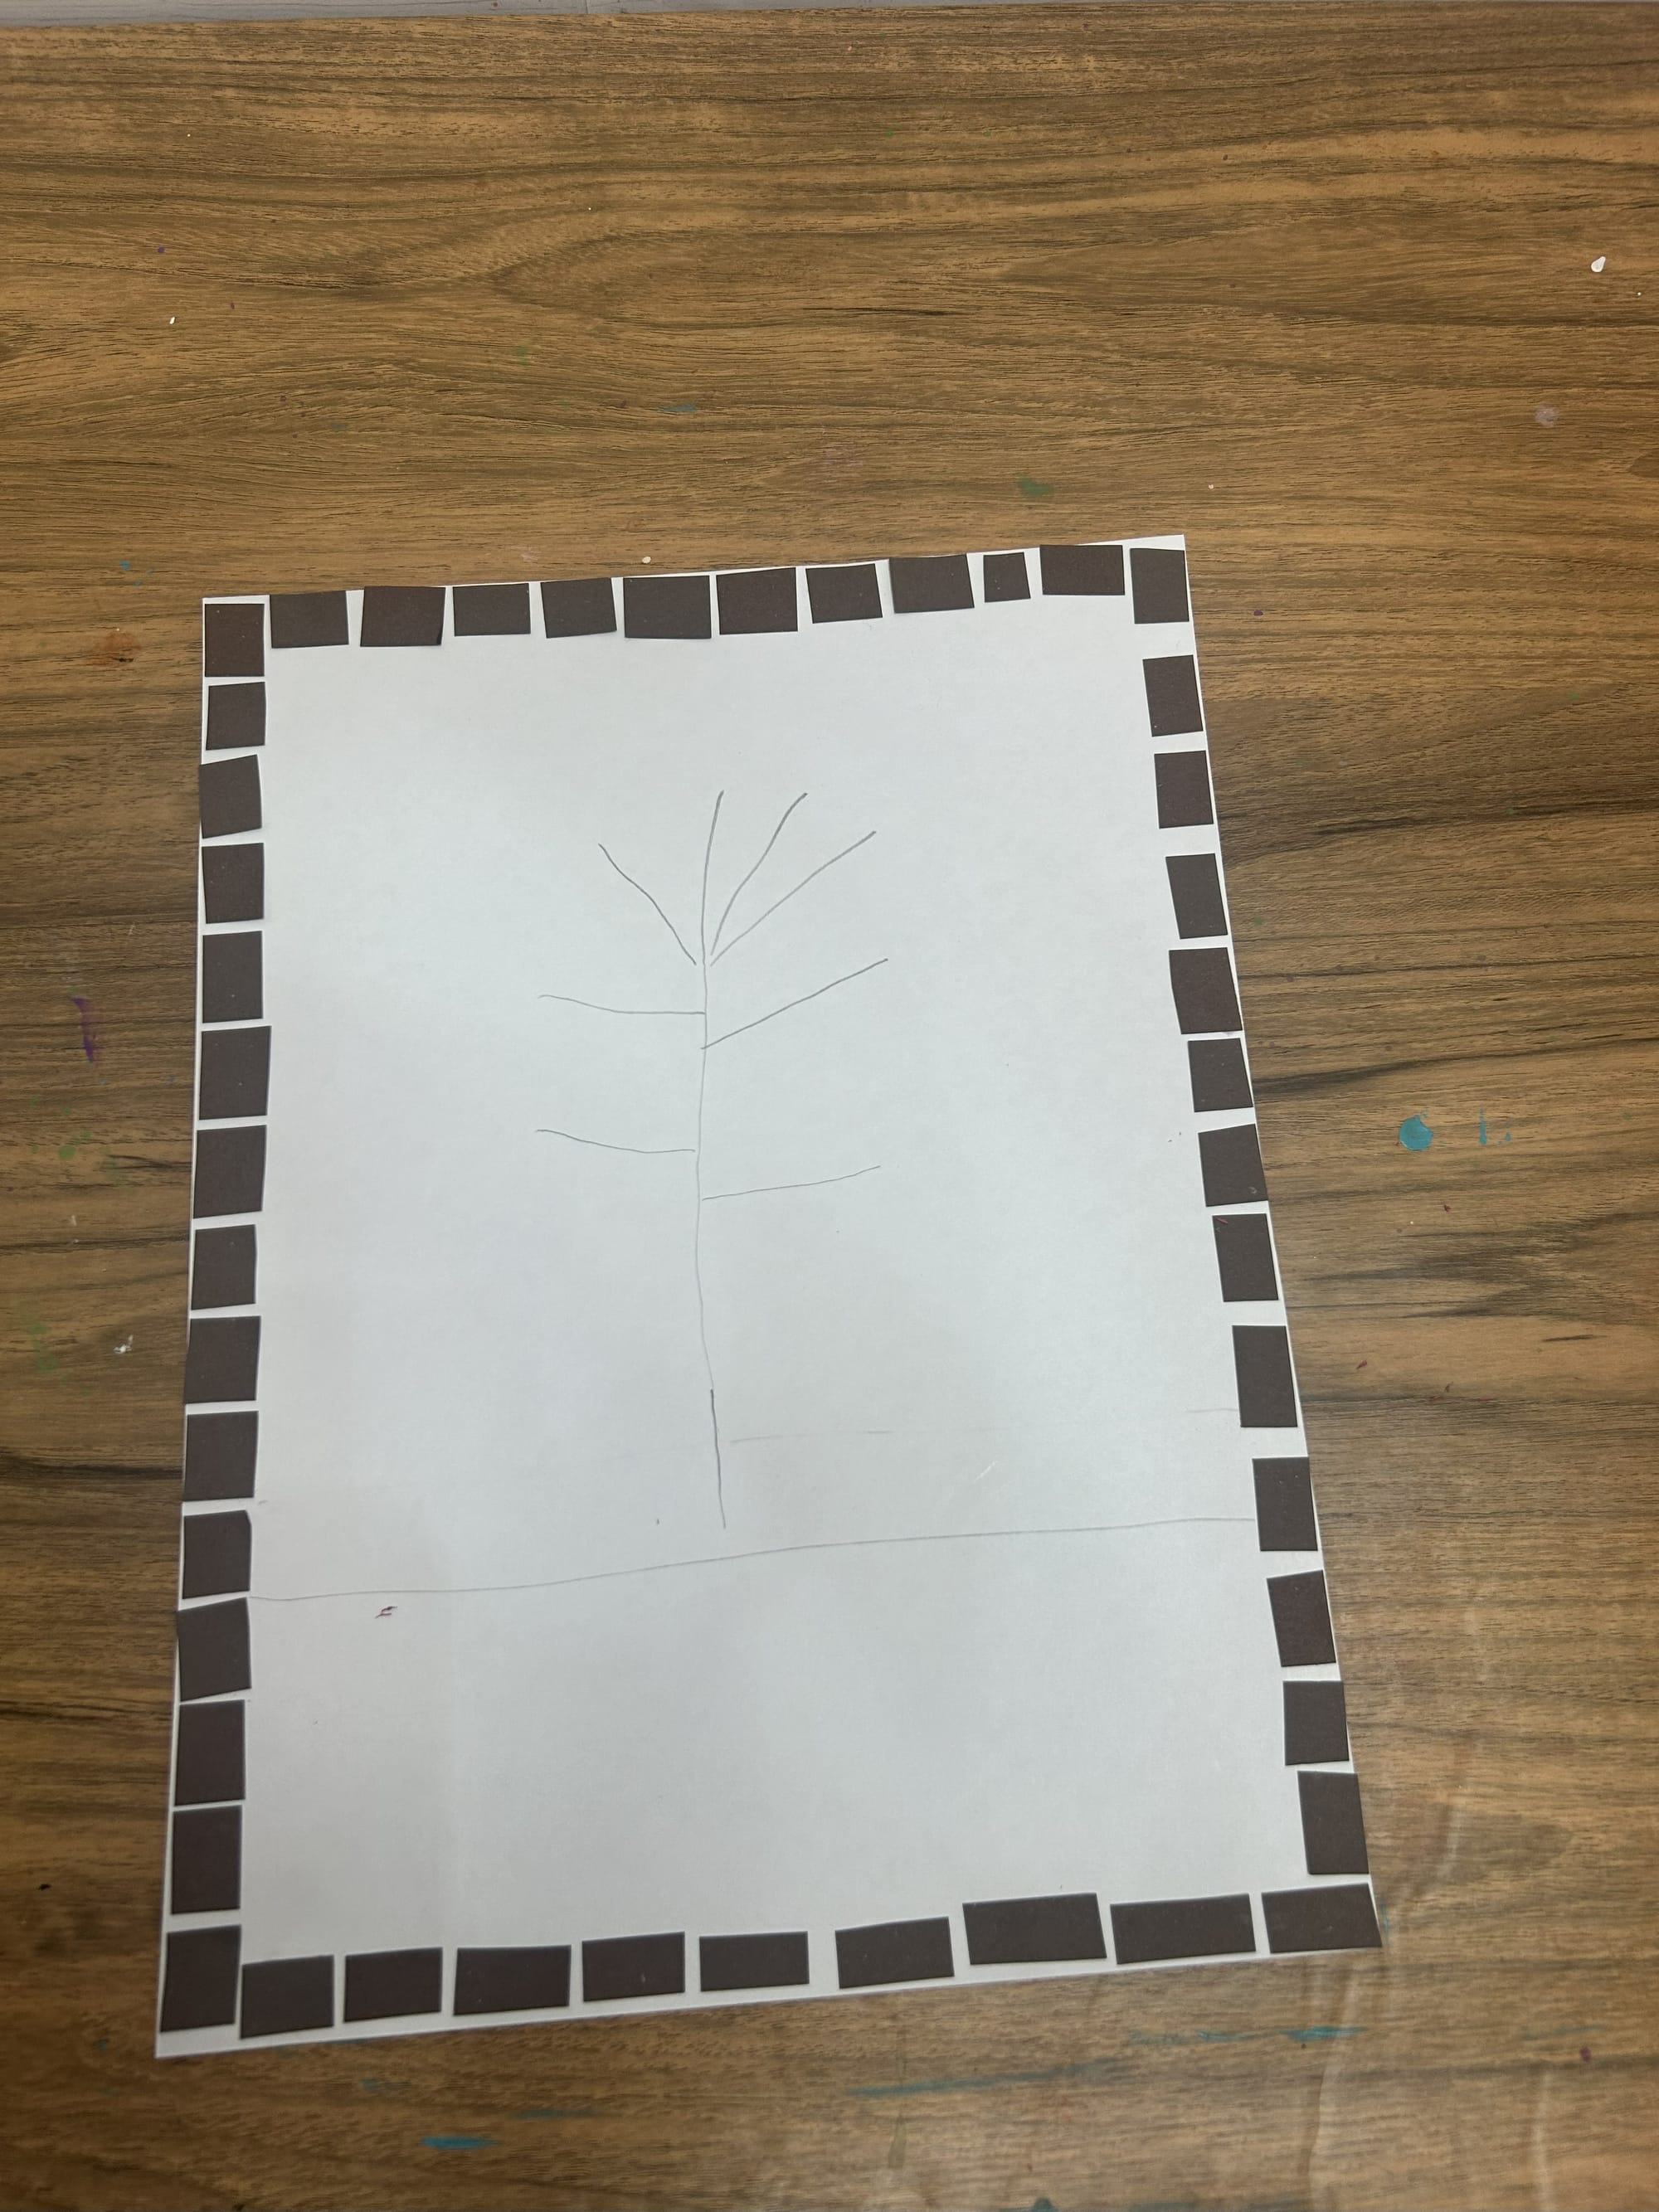
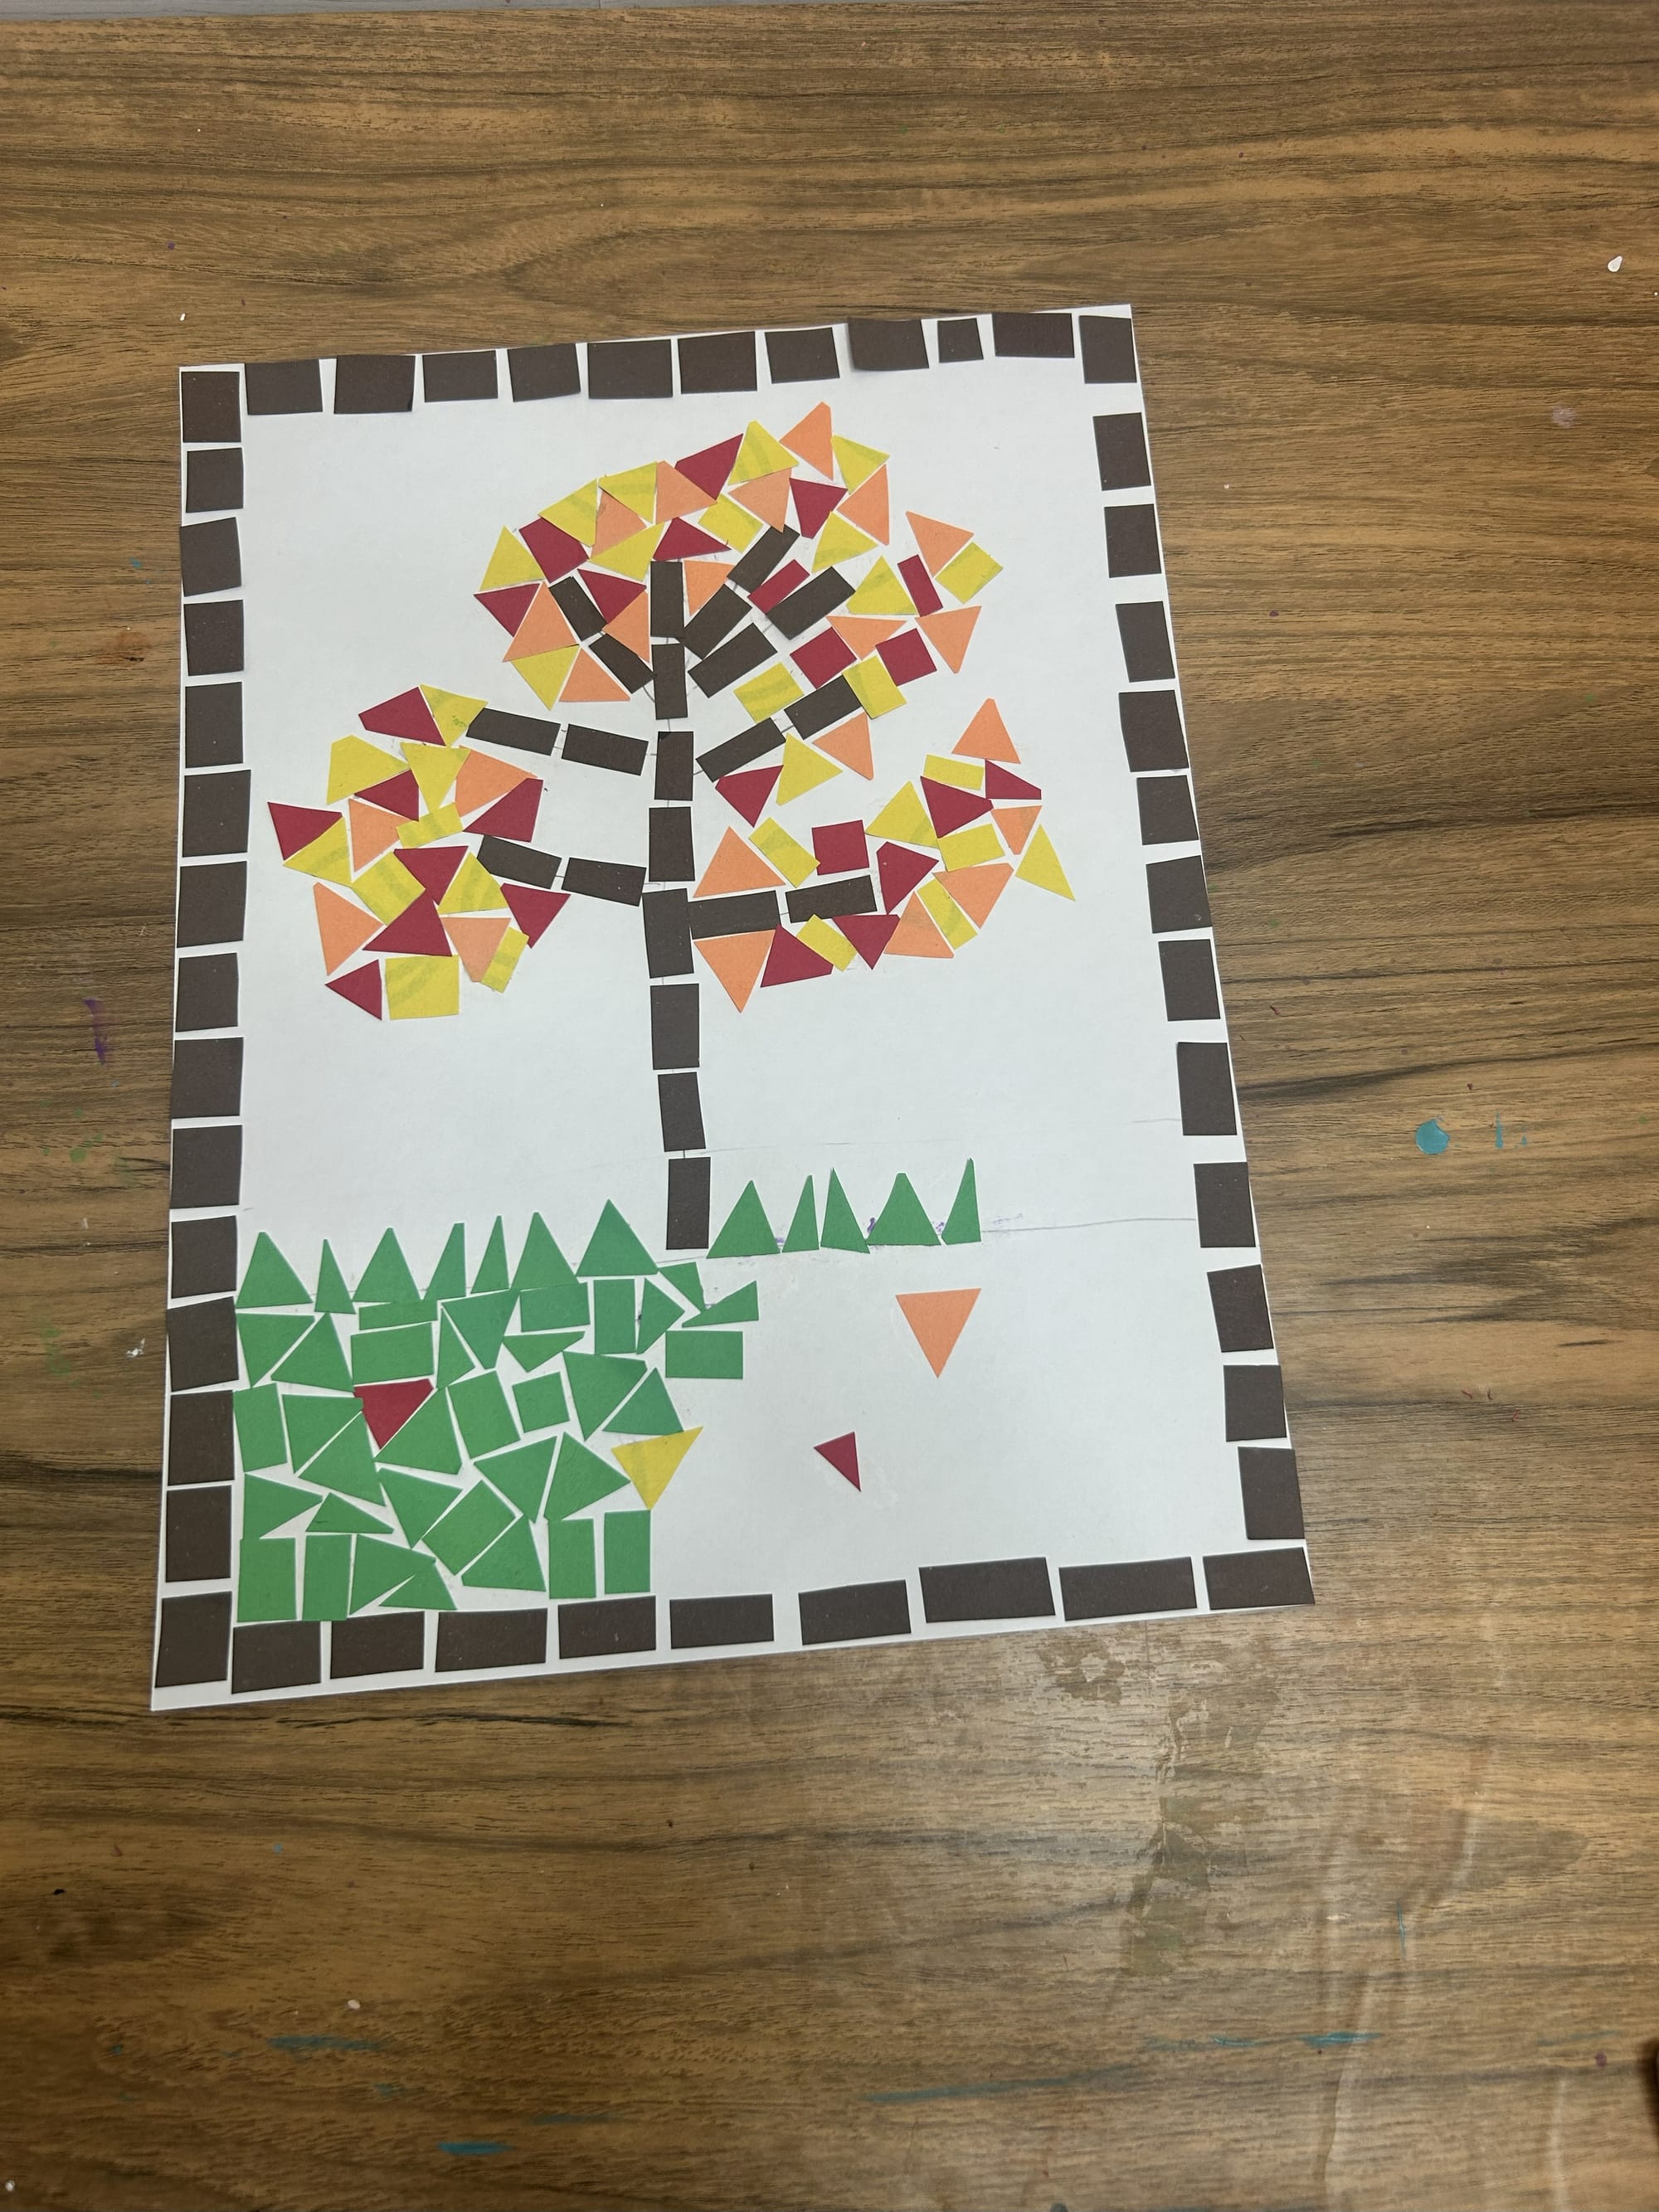
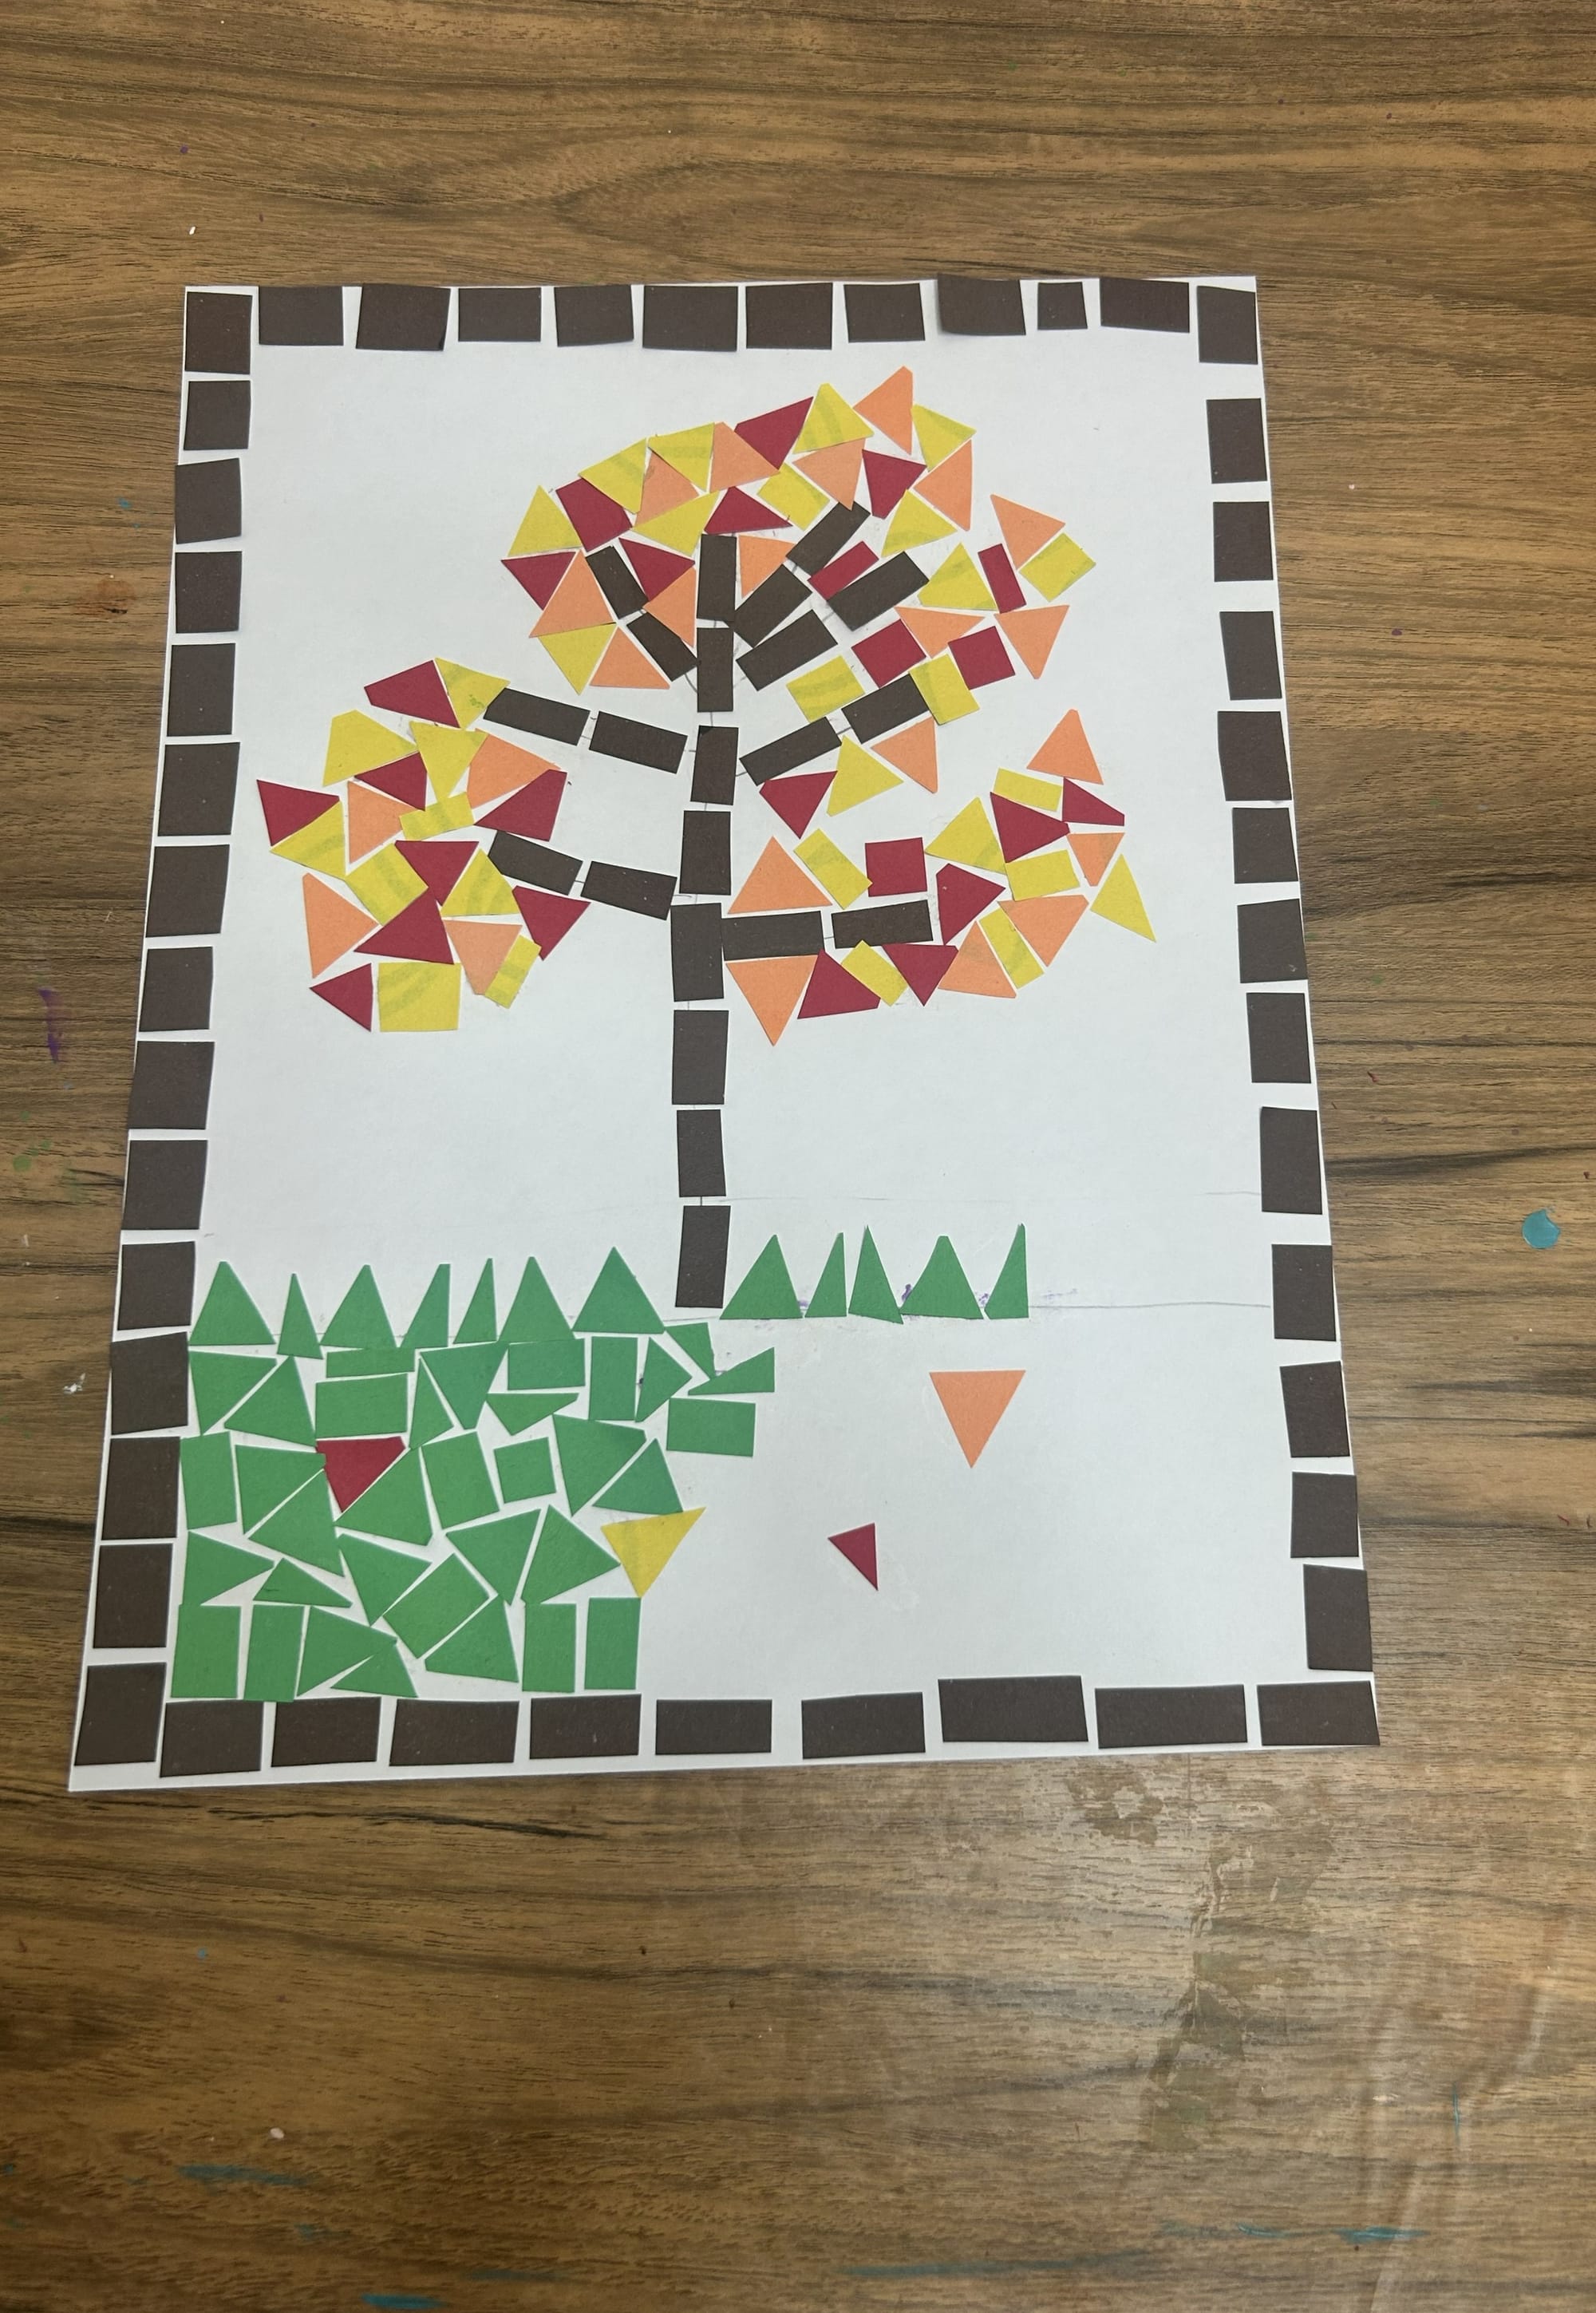
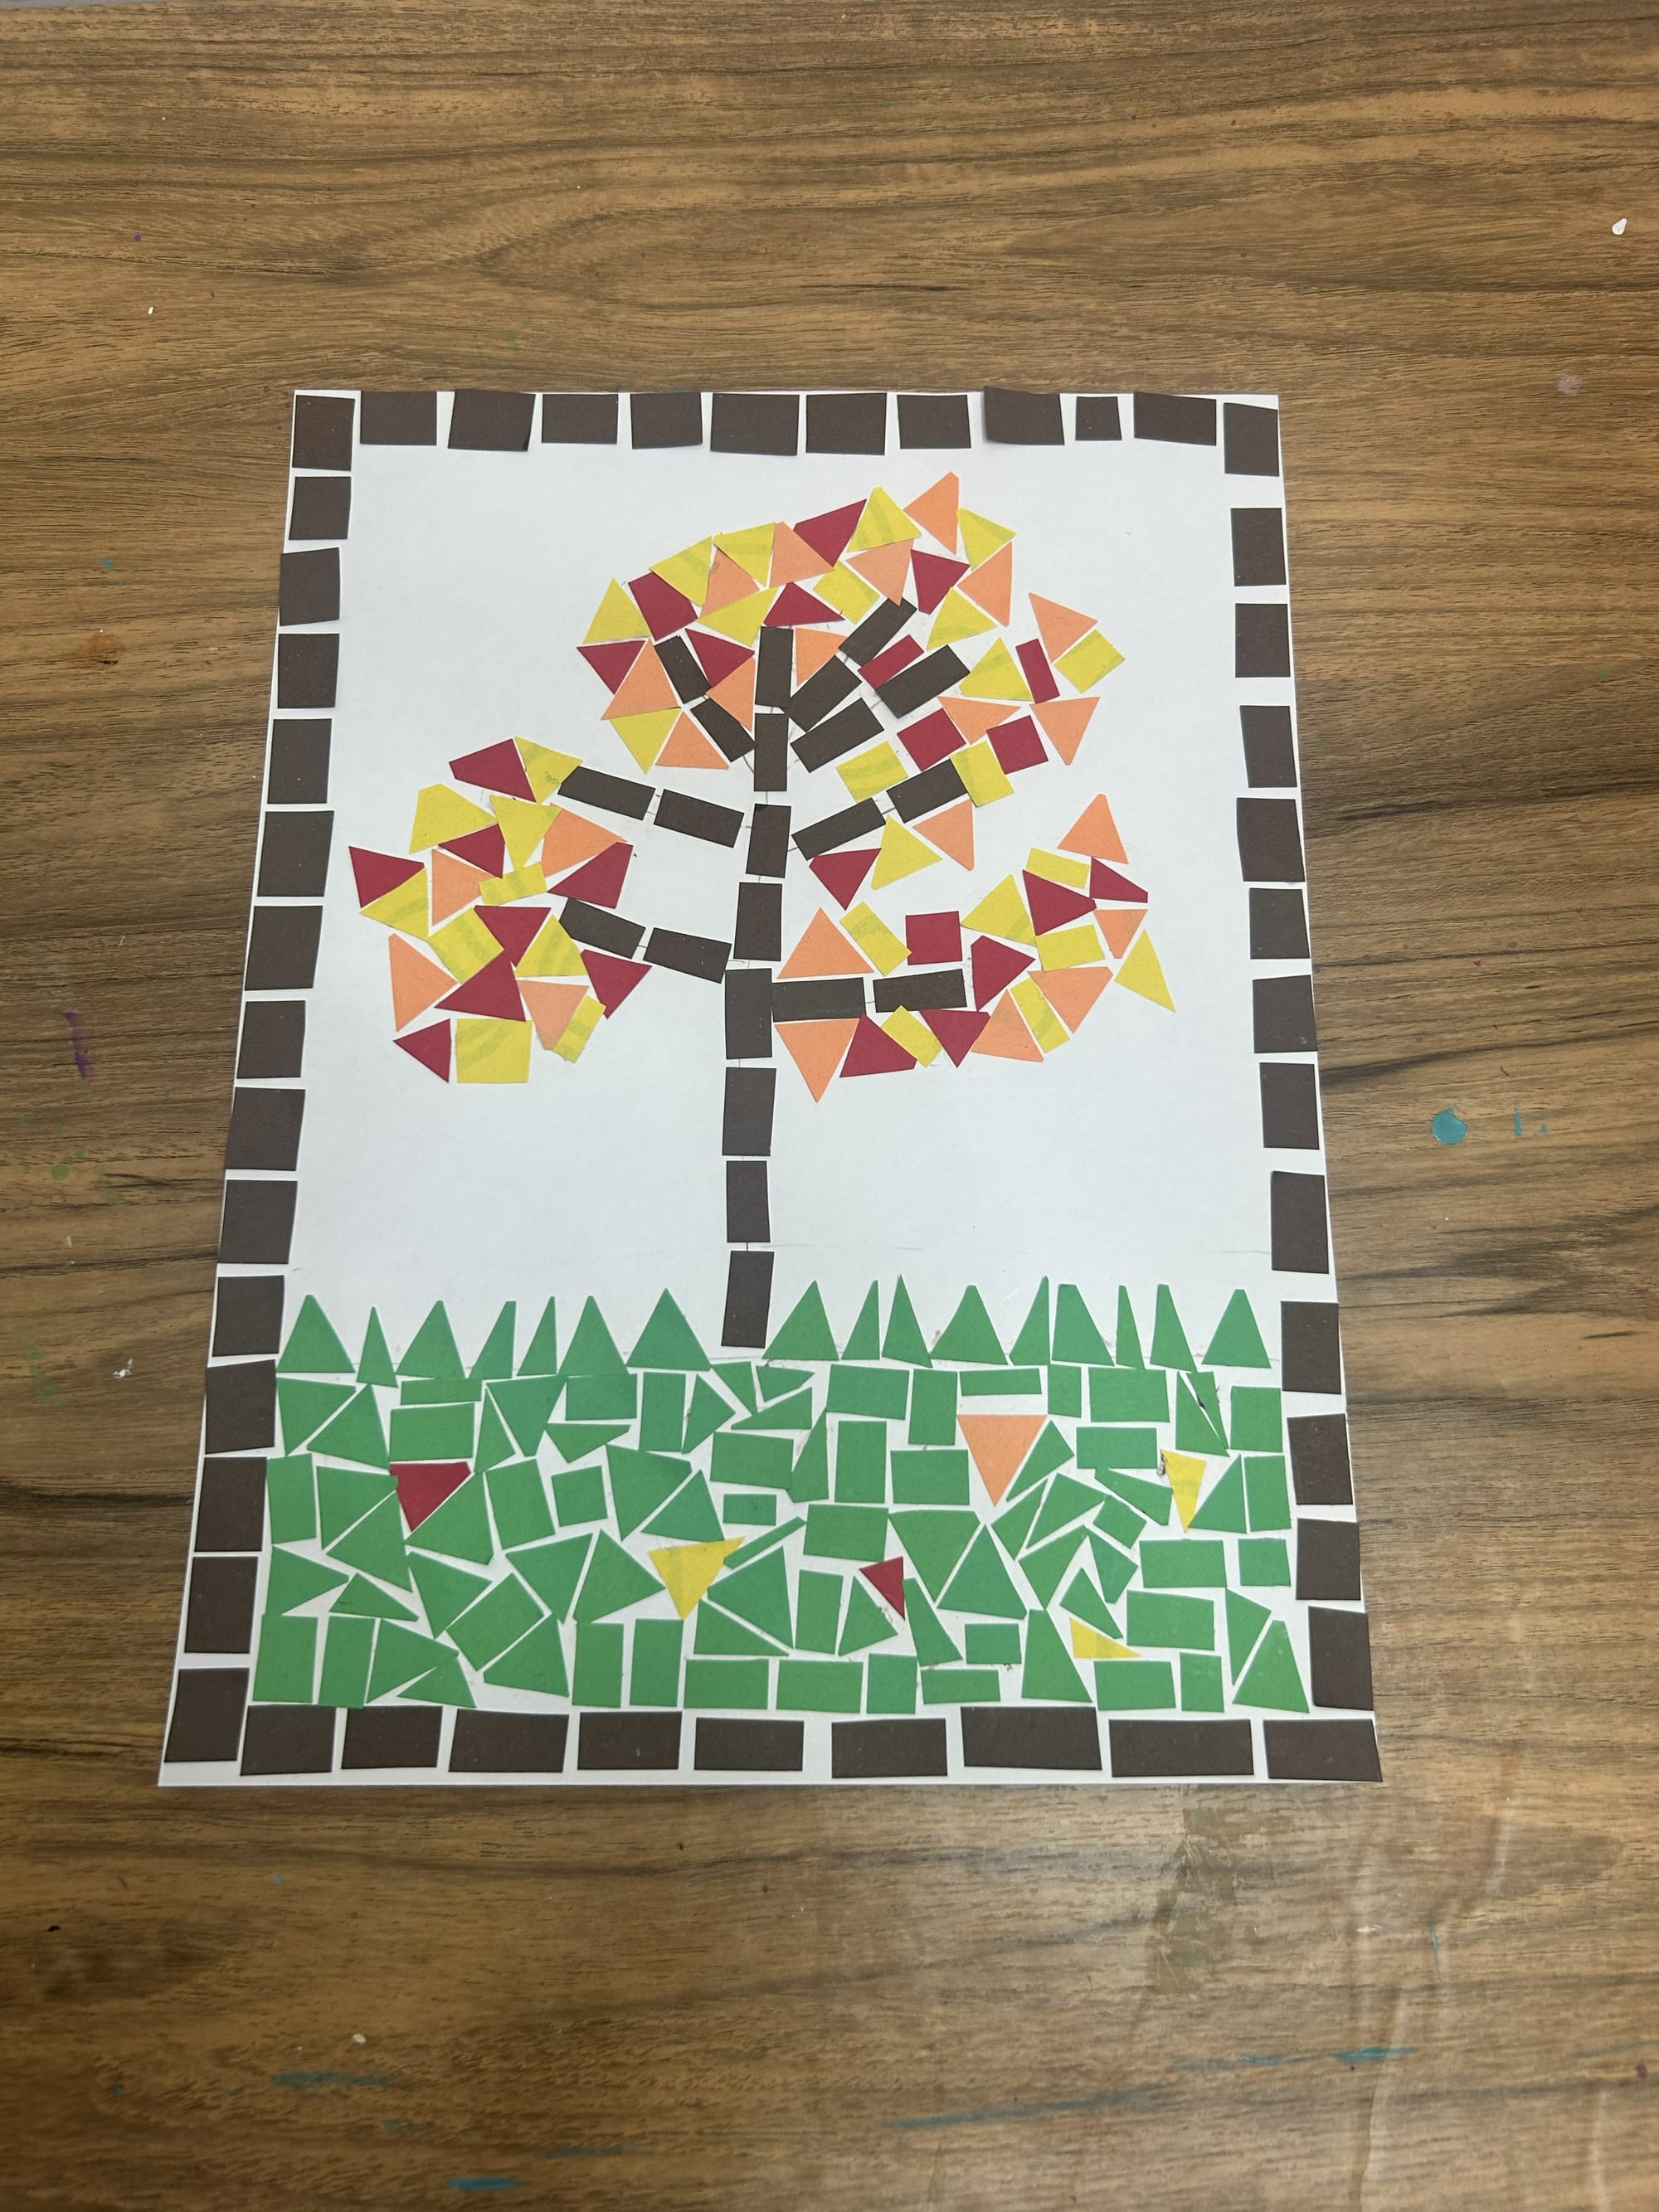
Create a border around your picture.
Step 3: Sketch your Design on Paper
Sketch your design on your paper. I drew a line for where I will have the grass line and tree with small lines.

Add to your paper pieces to your design
Step 4: Add Paper Pieces to Make the Tree
Begin by adding paper pieces onto your design to form the tree.
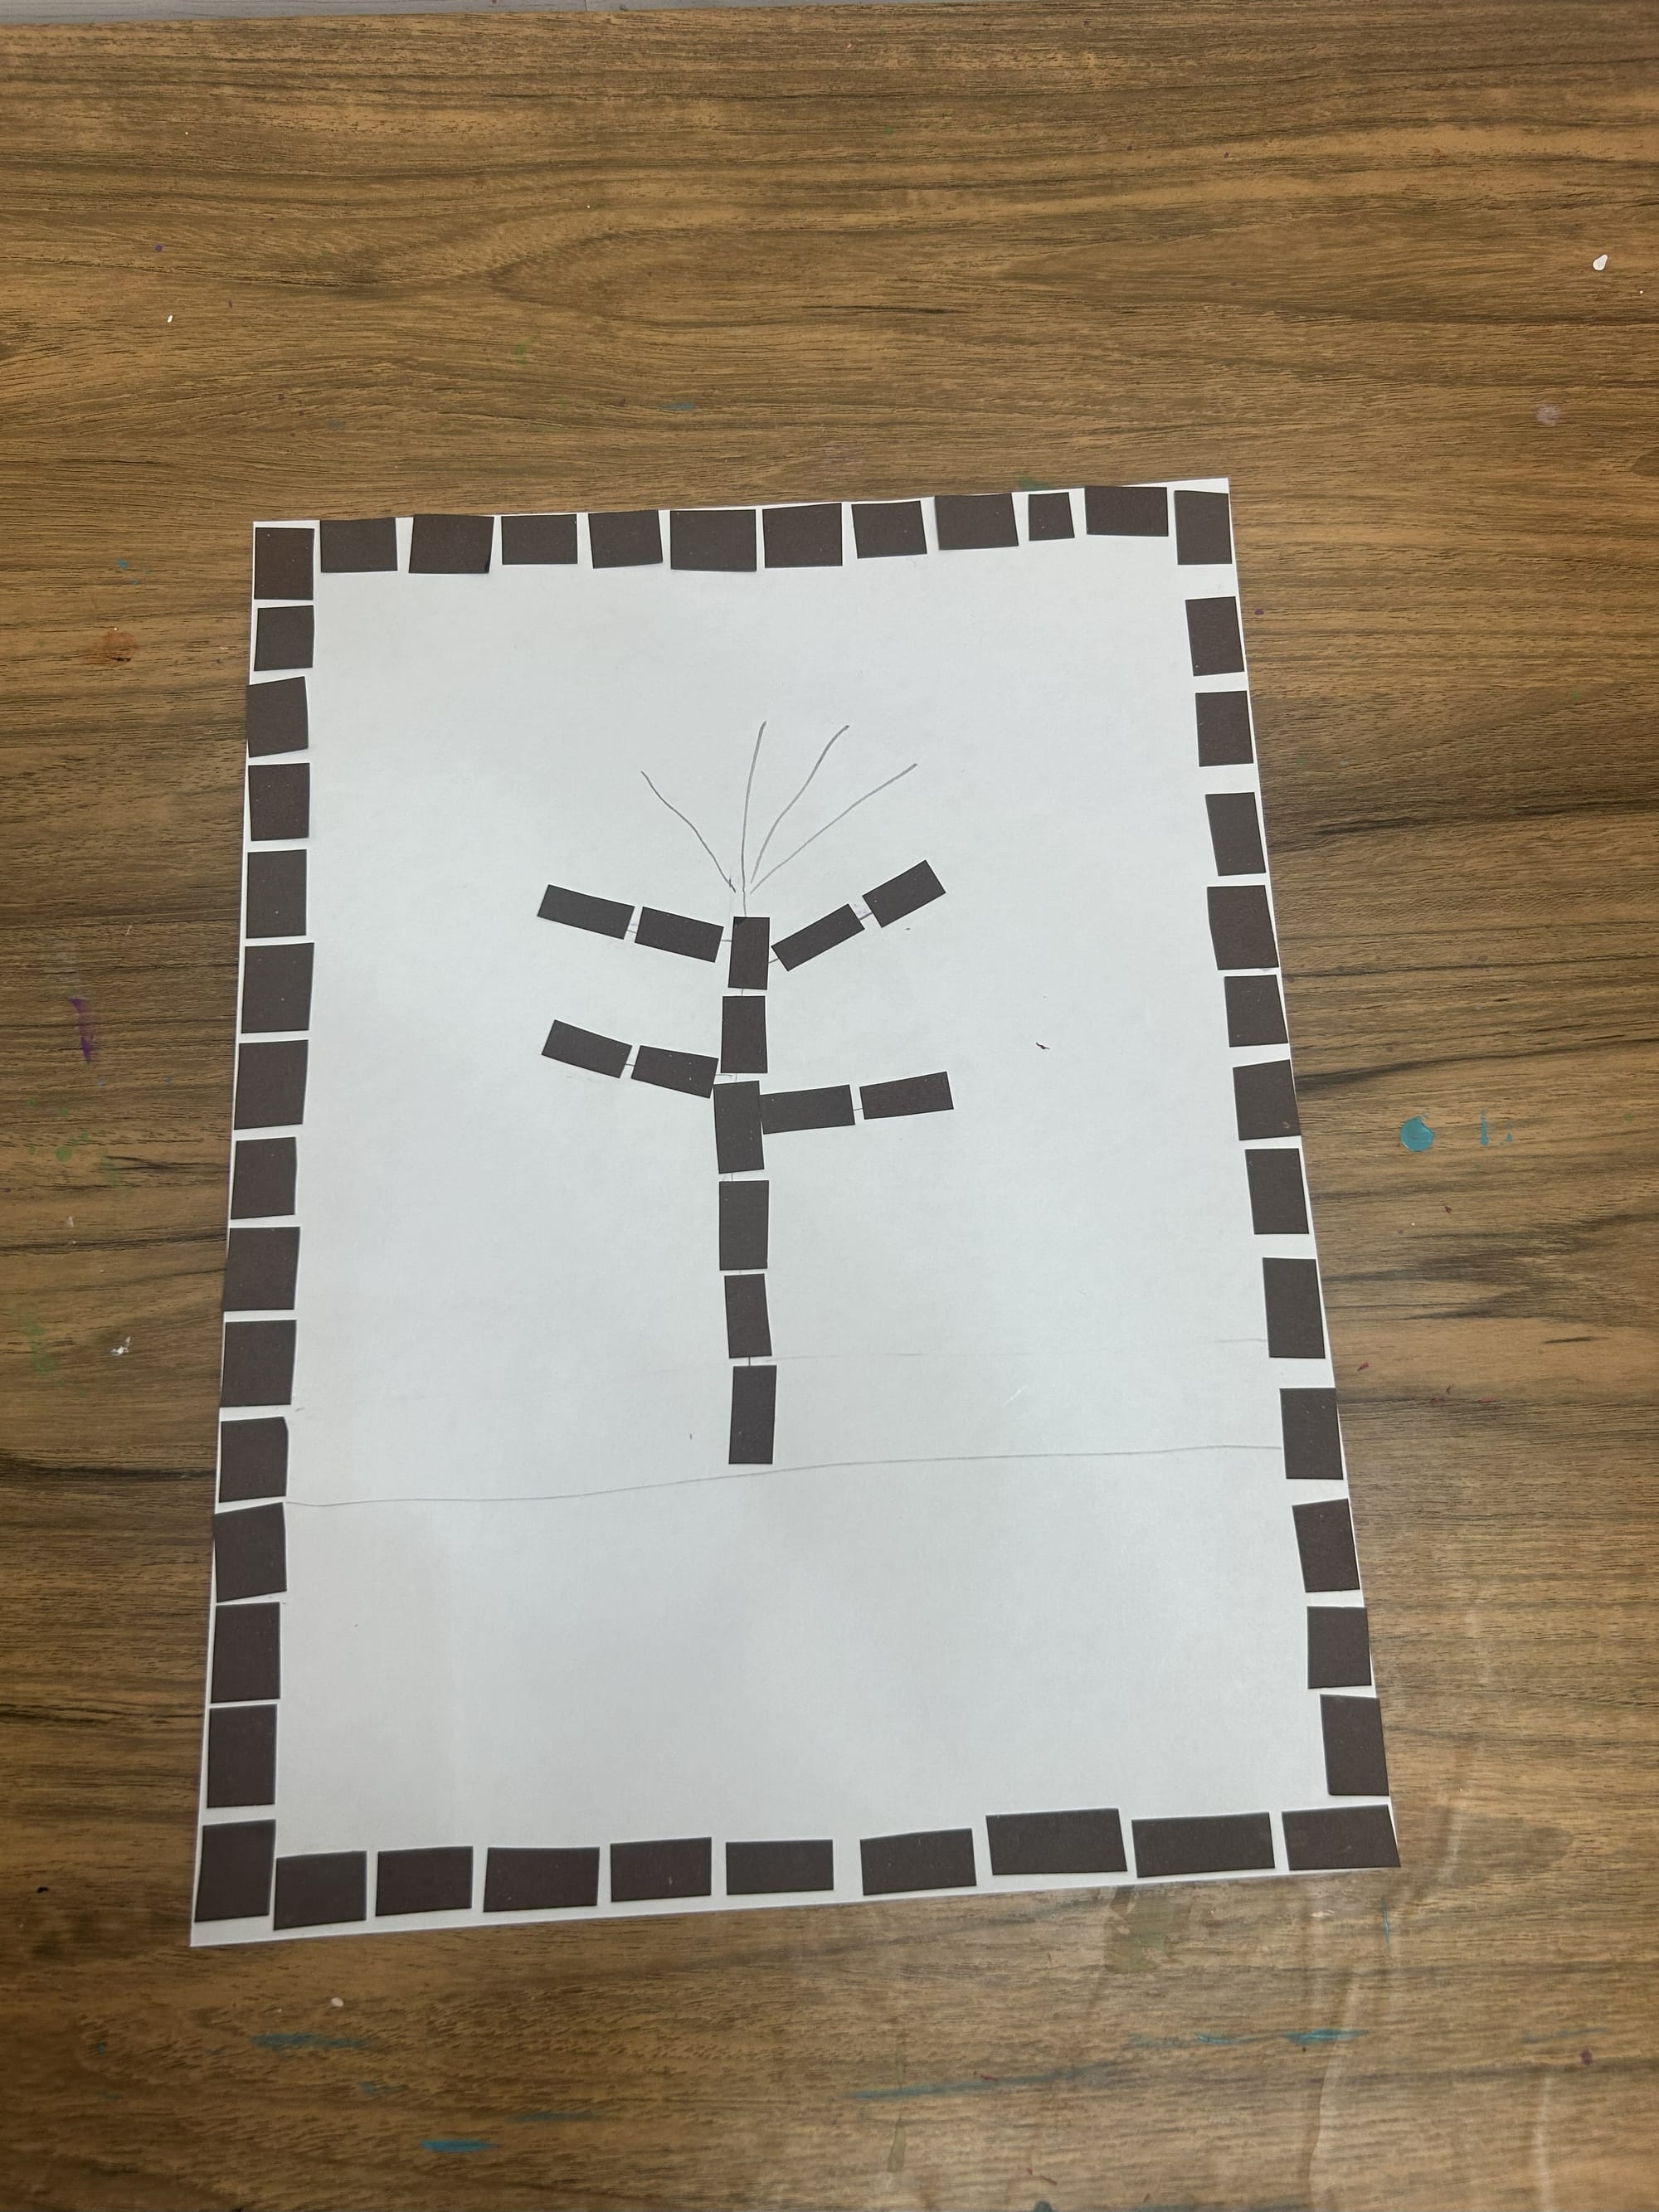
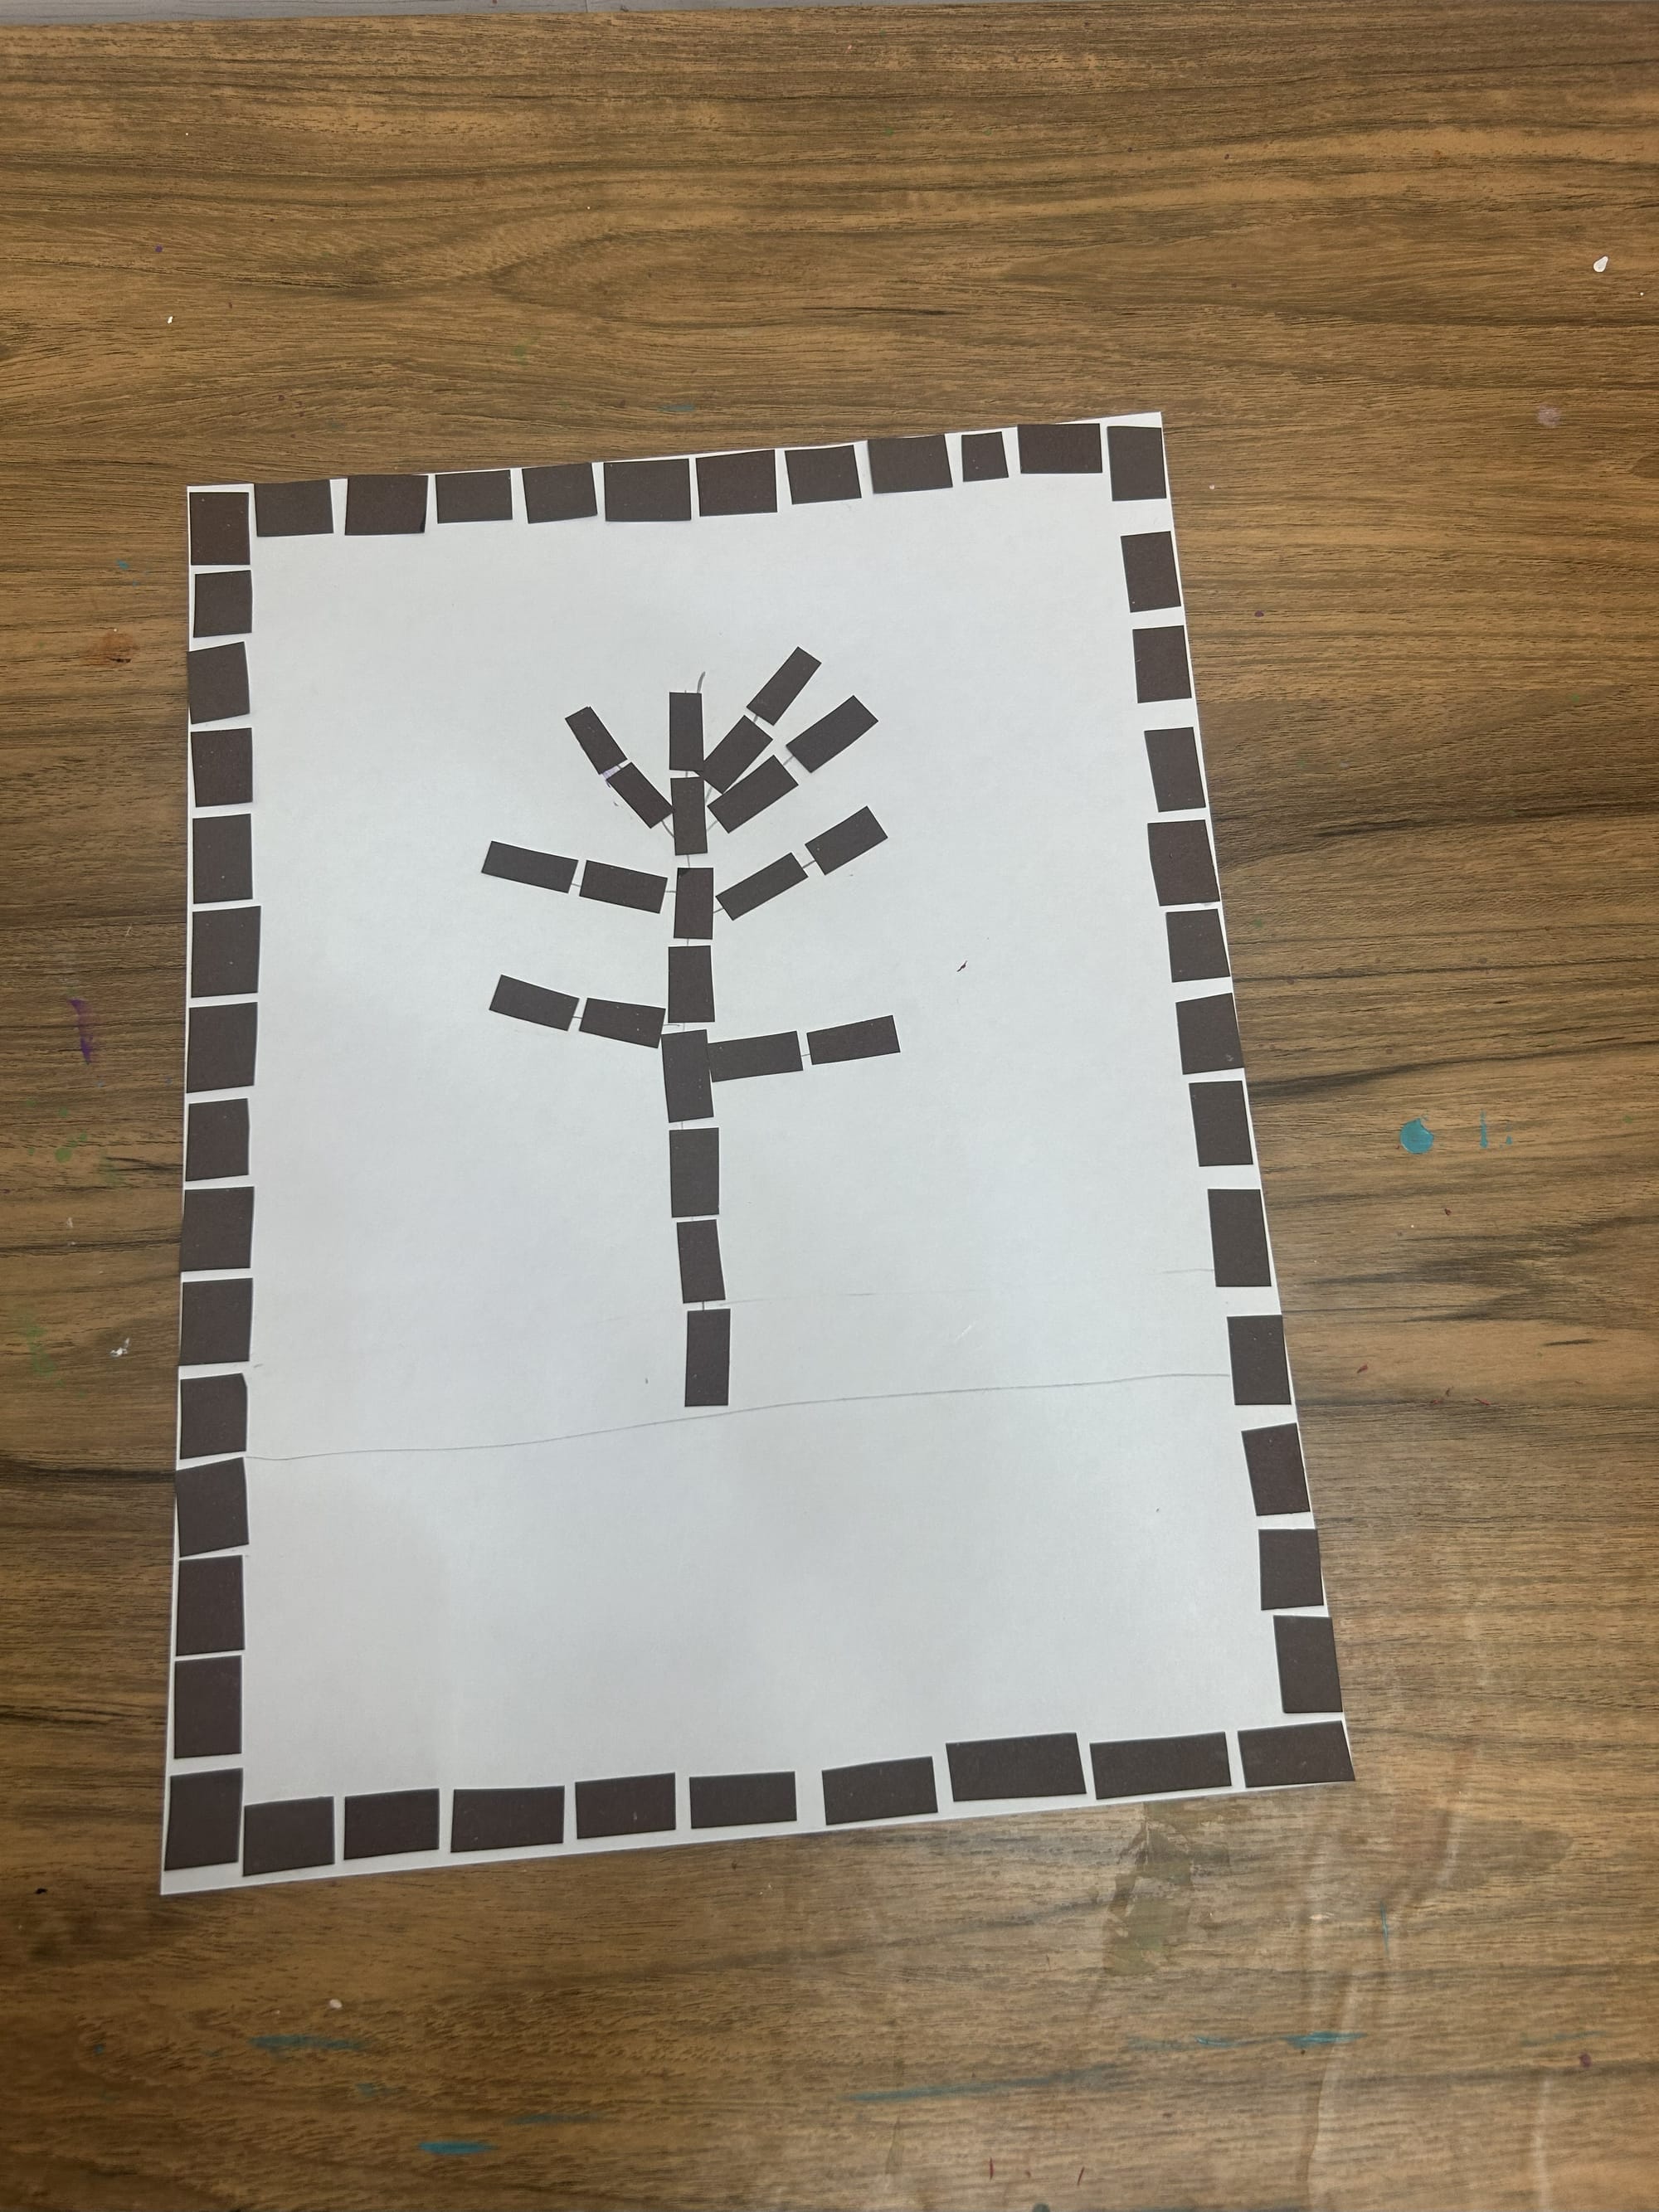
Add pieces to make the tree
Step 5: Add Paper Pieces to create the Leaves
Continue adding colors to your design. I added red, orange and yellow pieces to tree and a few on the ground to act as fallen leaves.
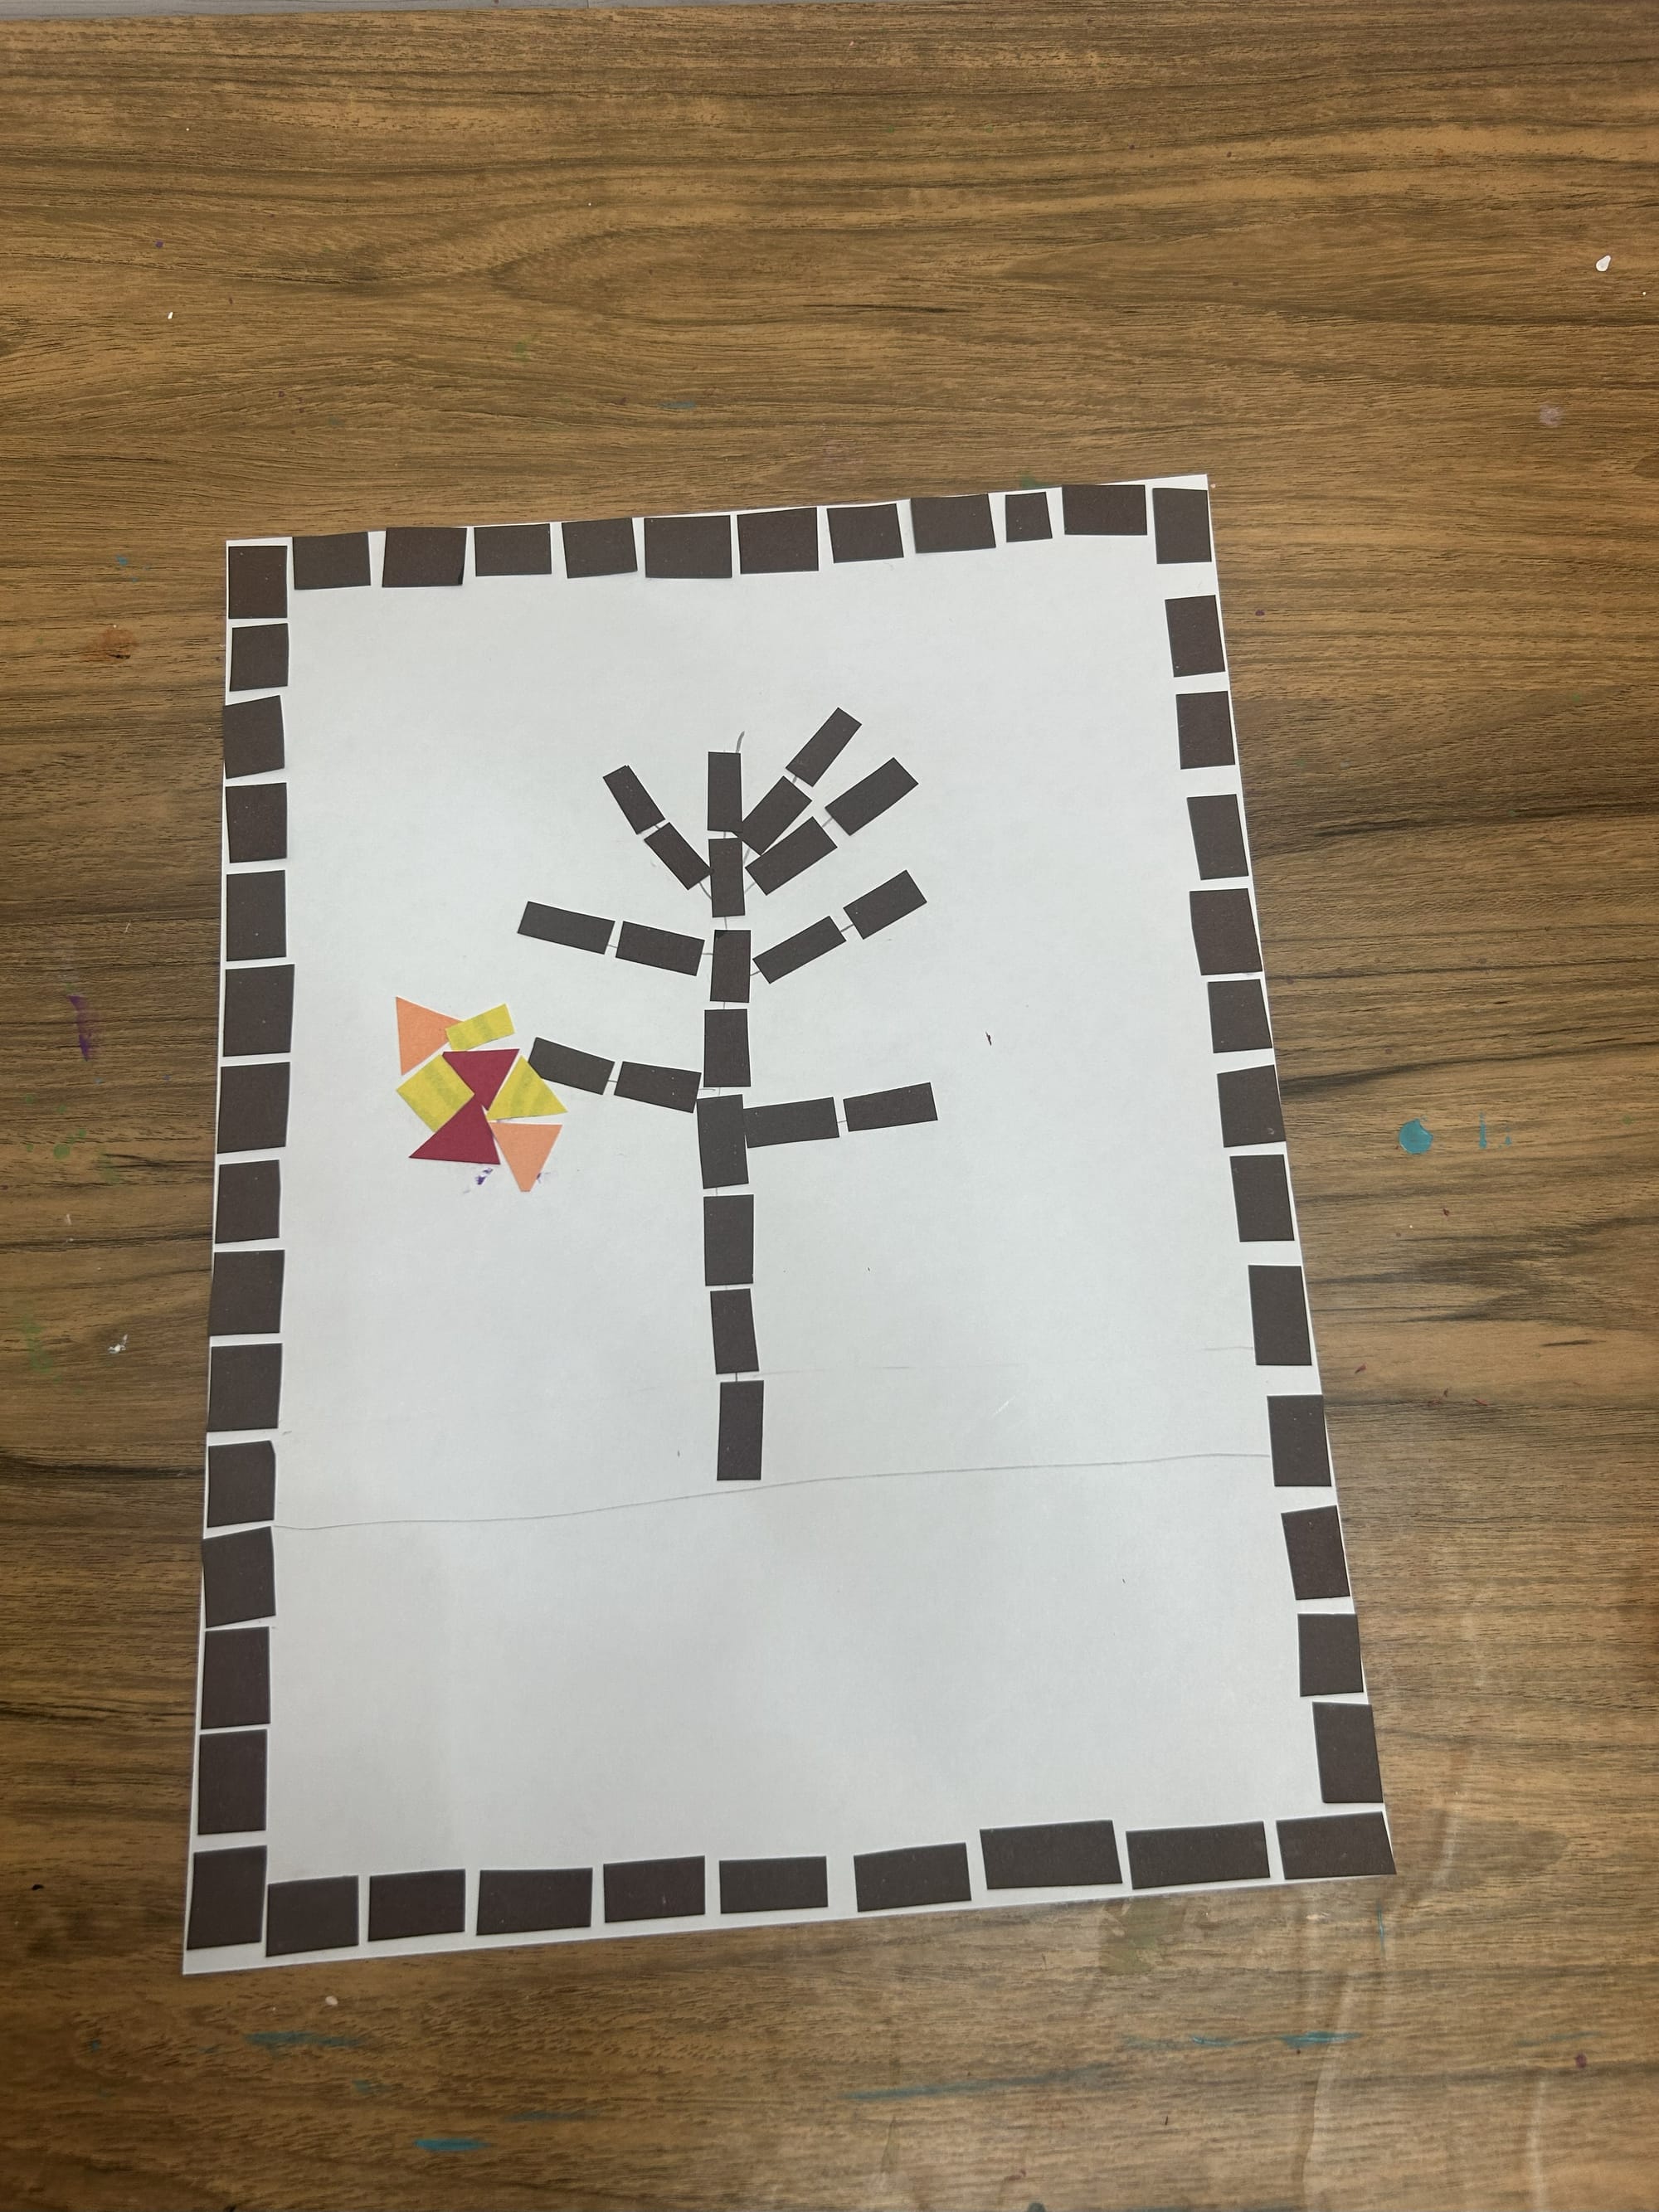
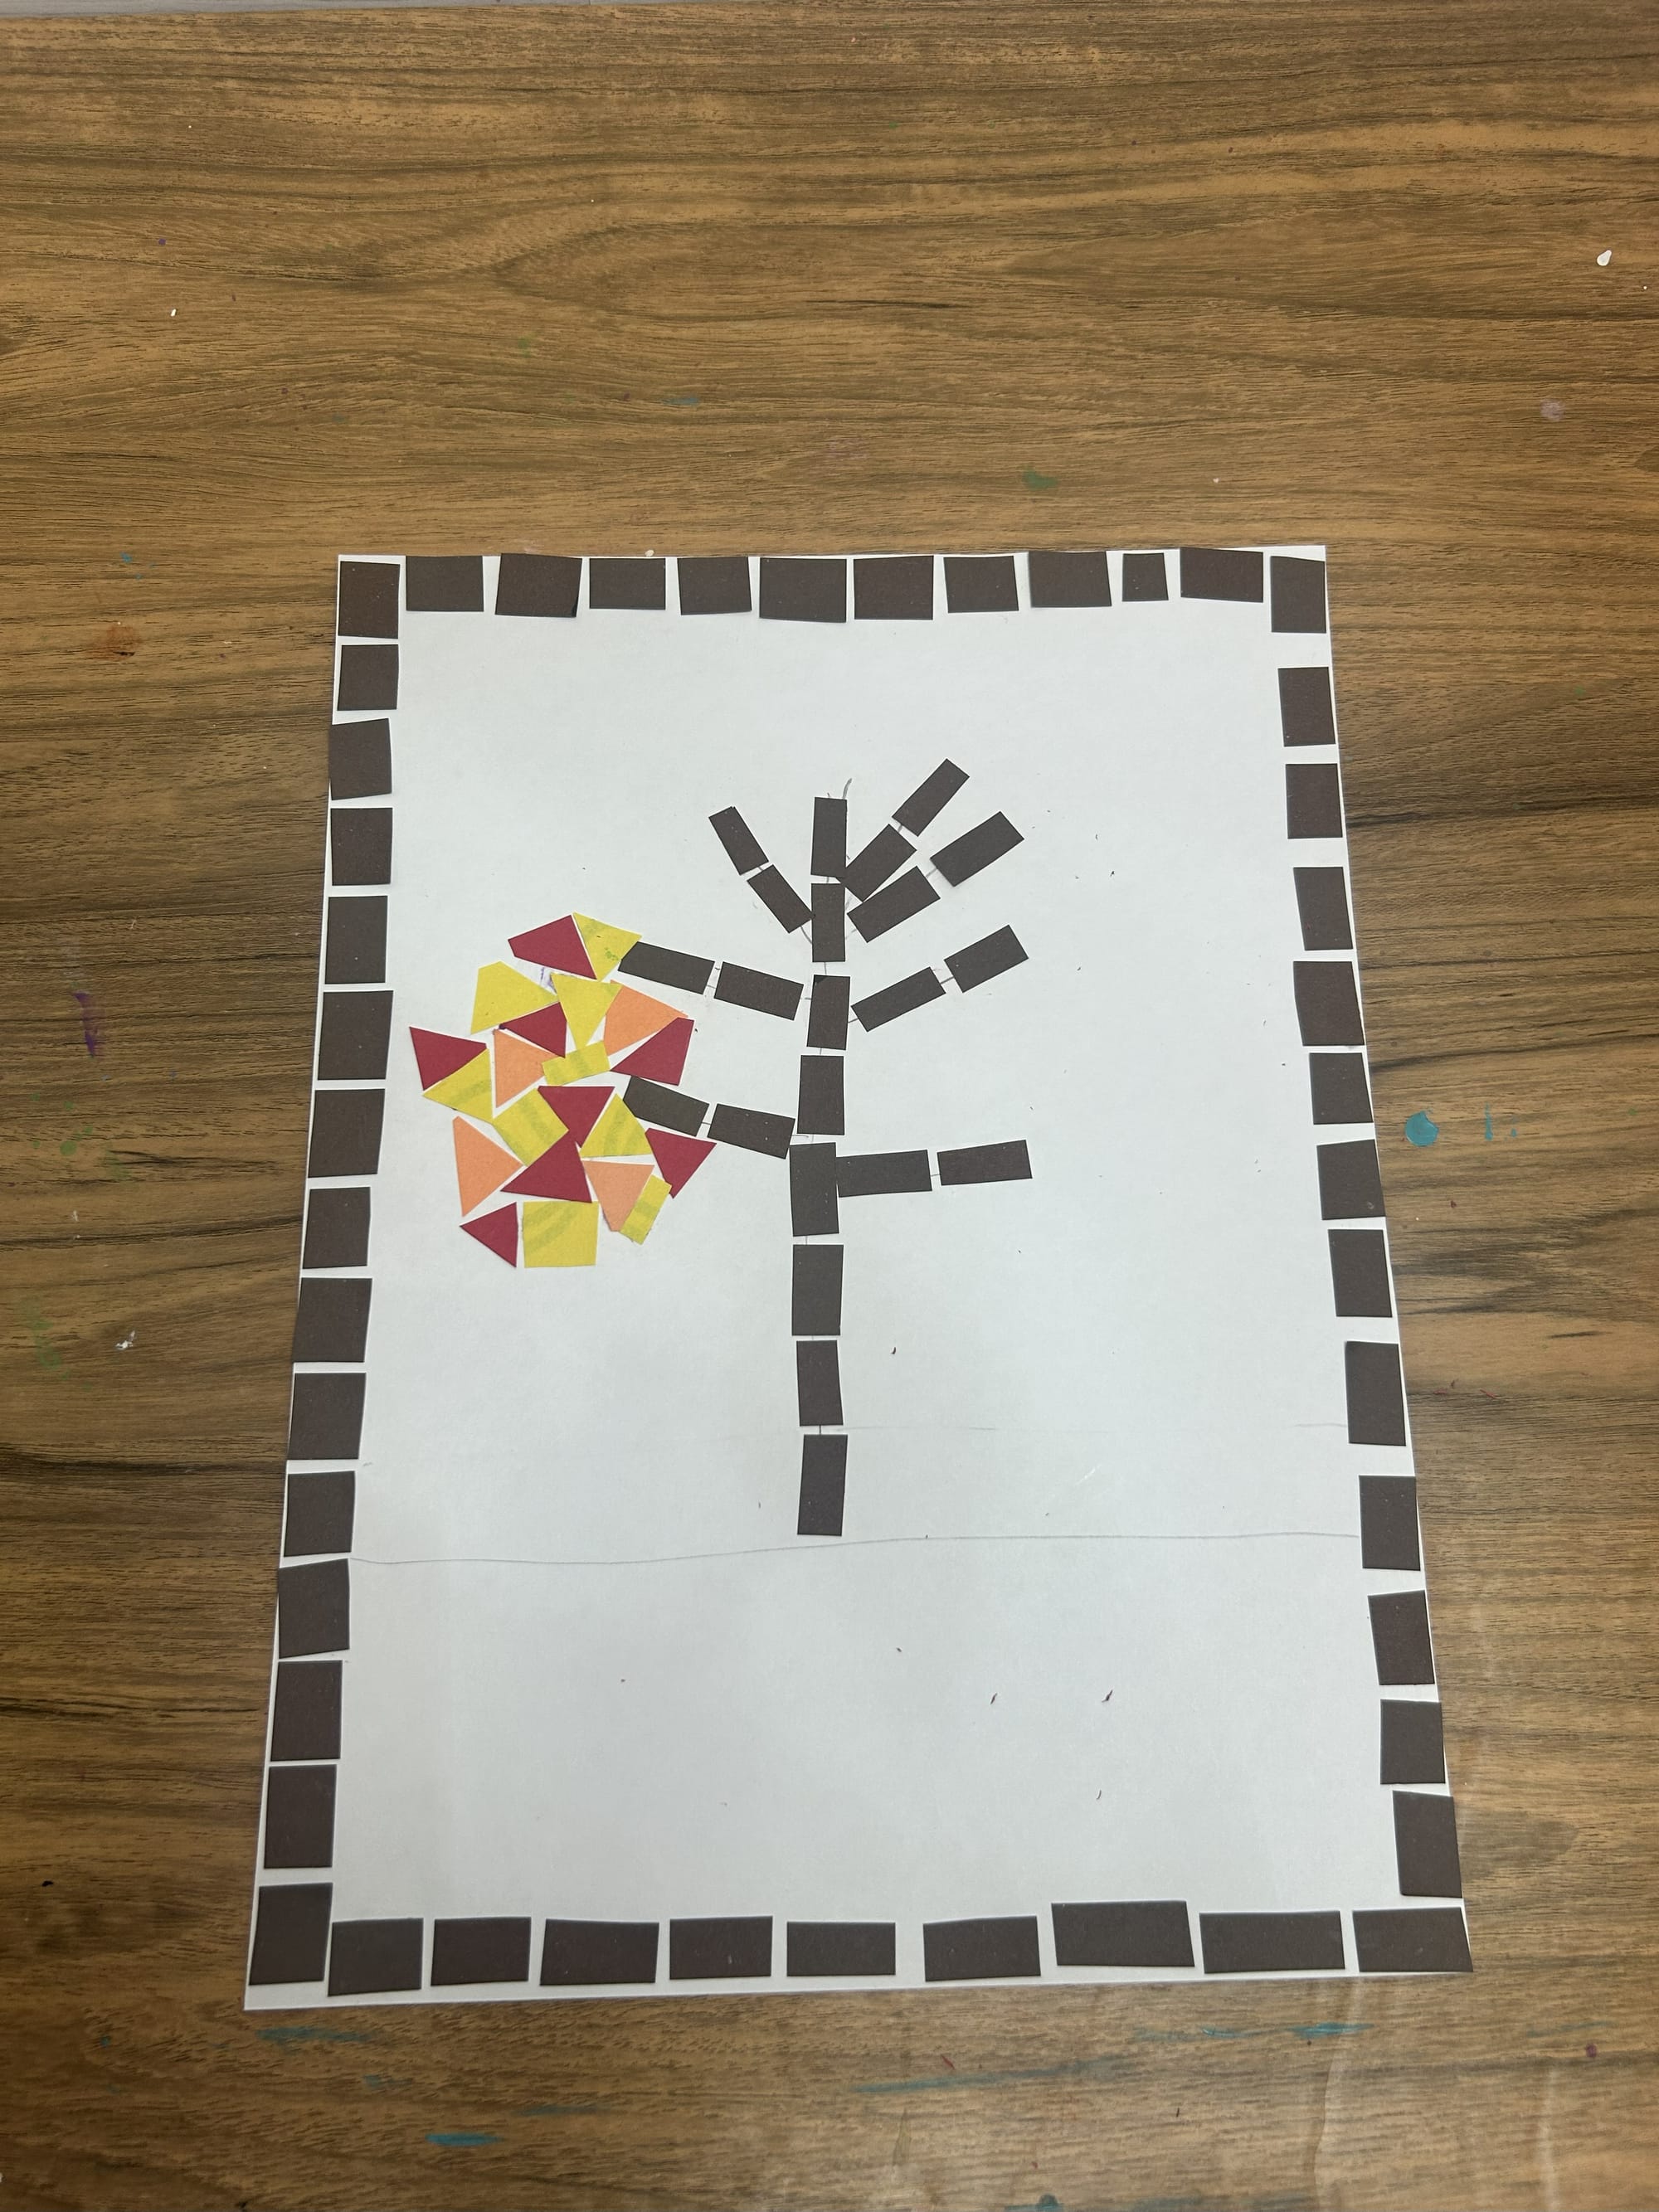
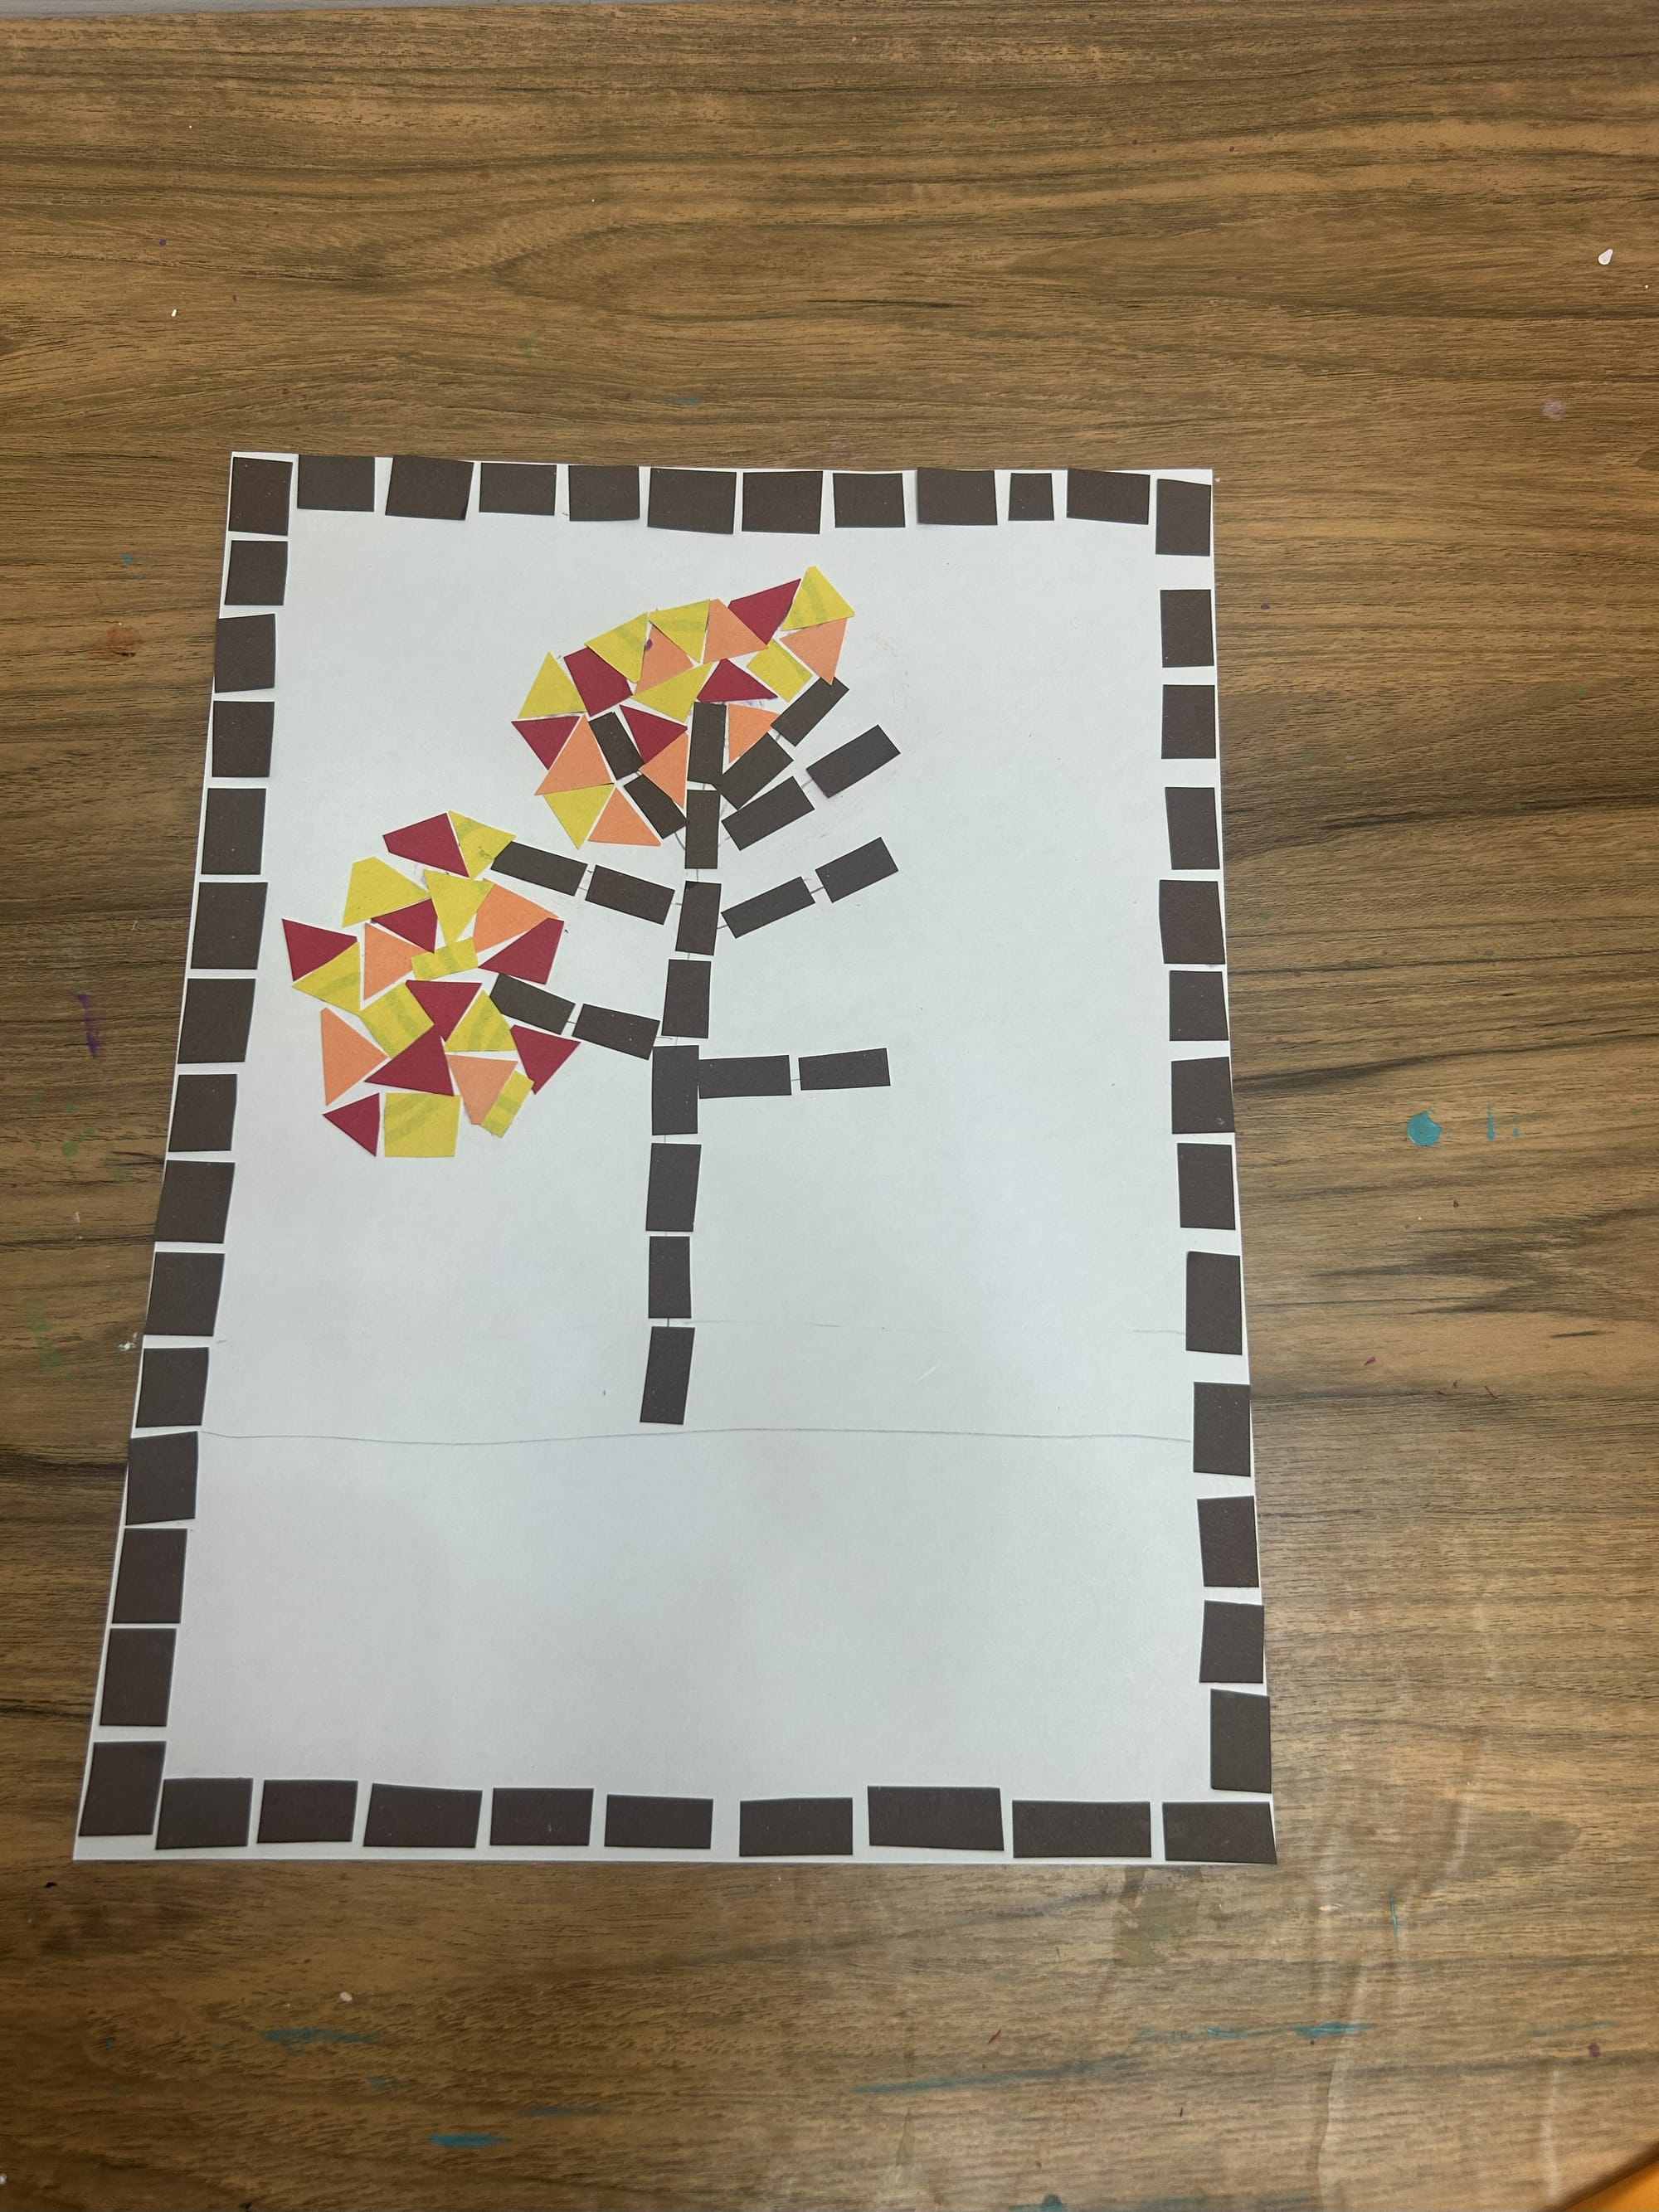
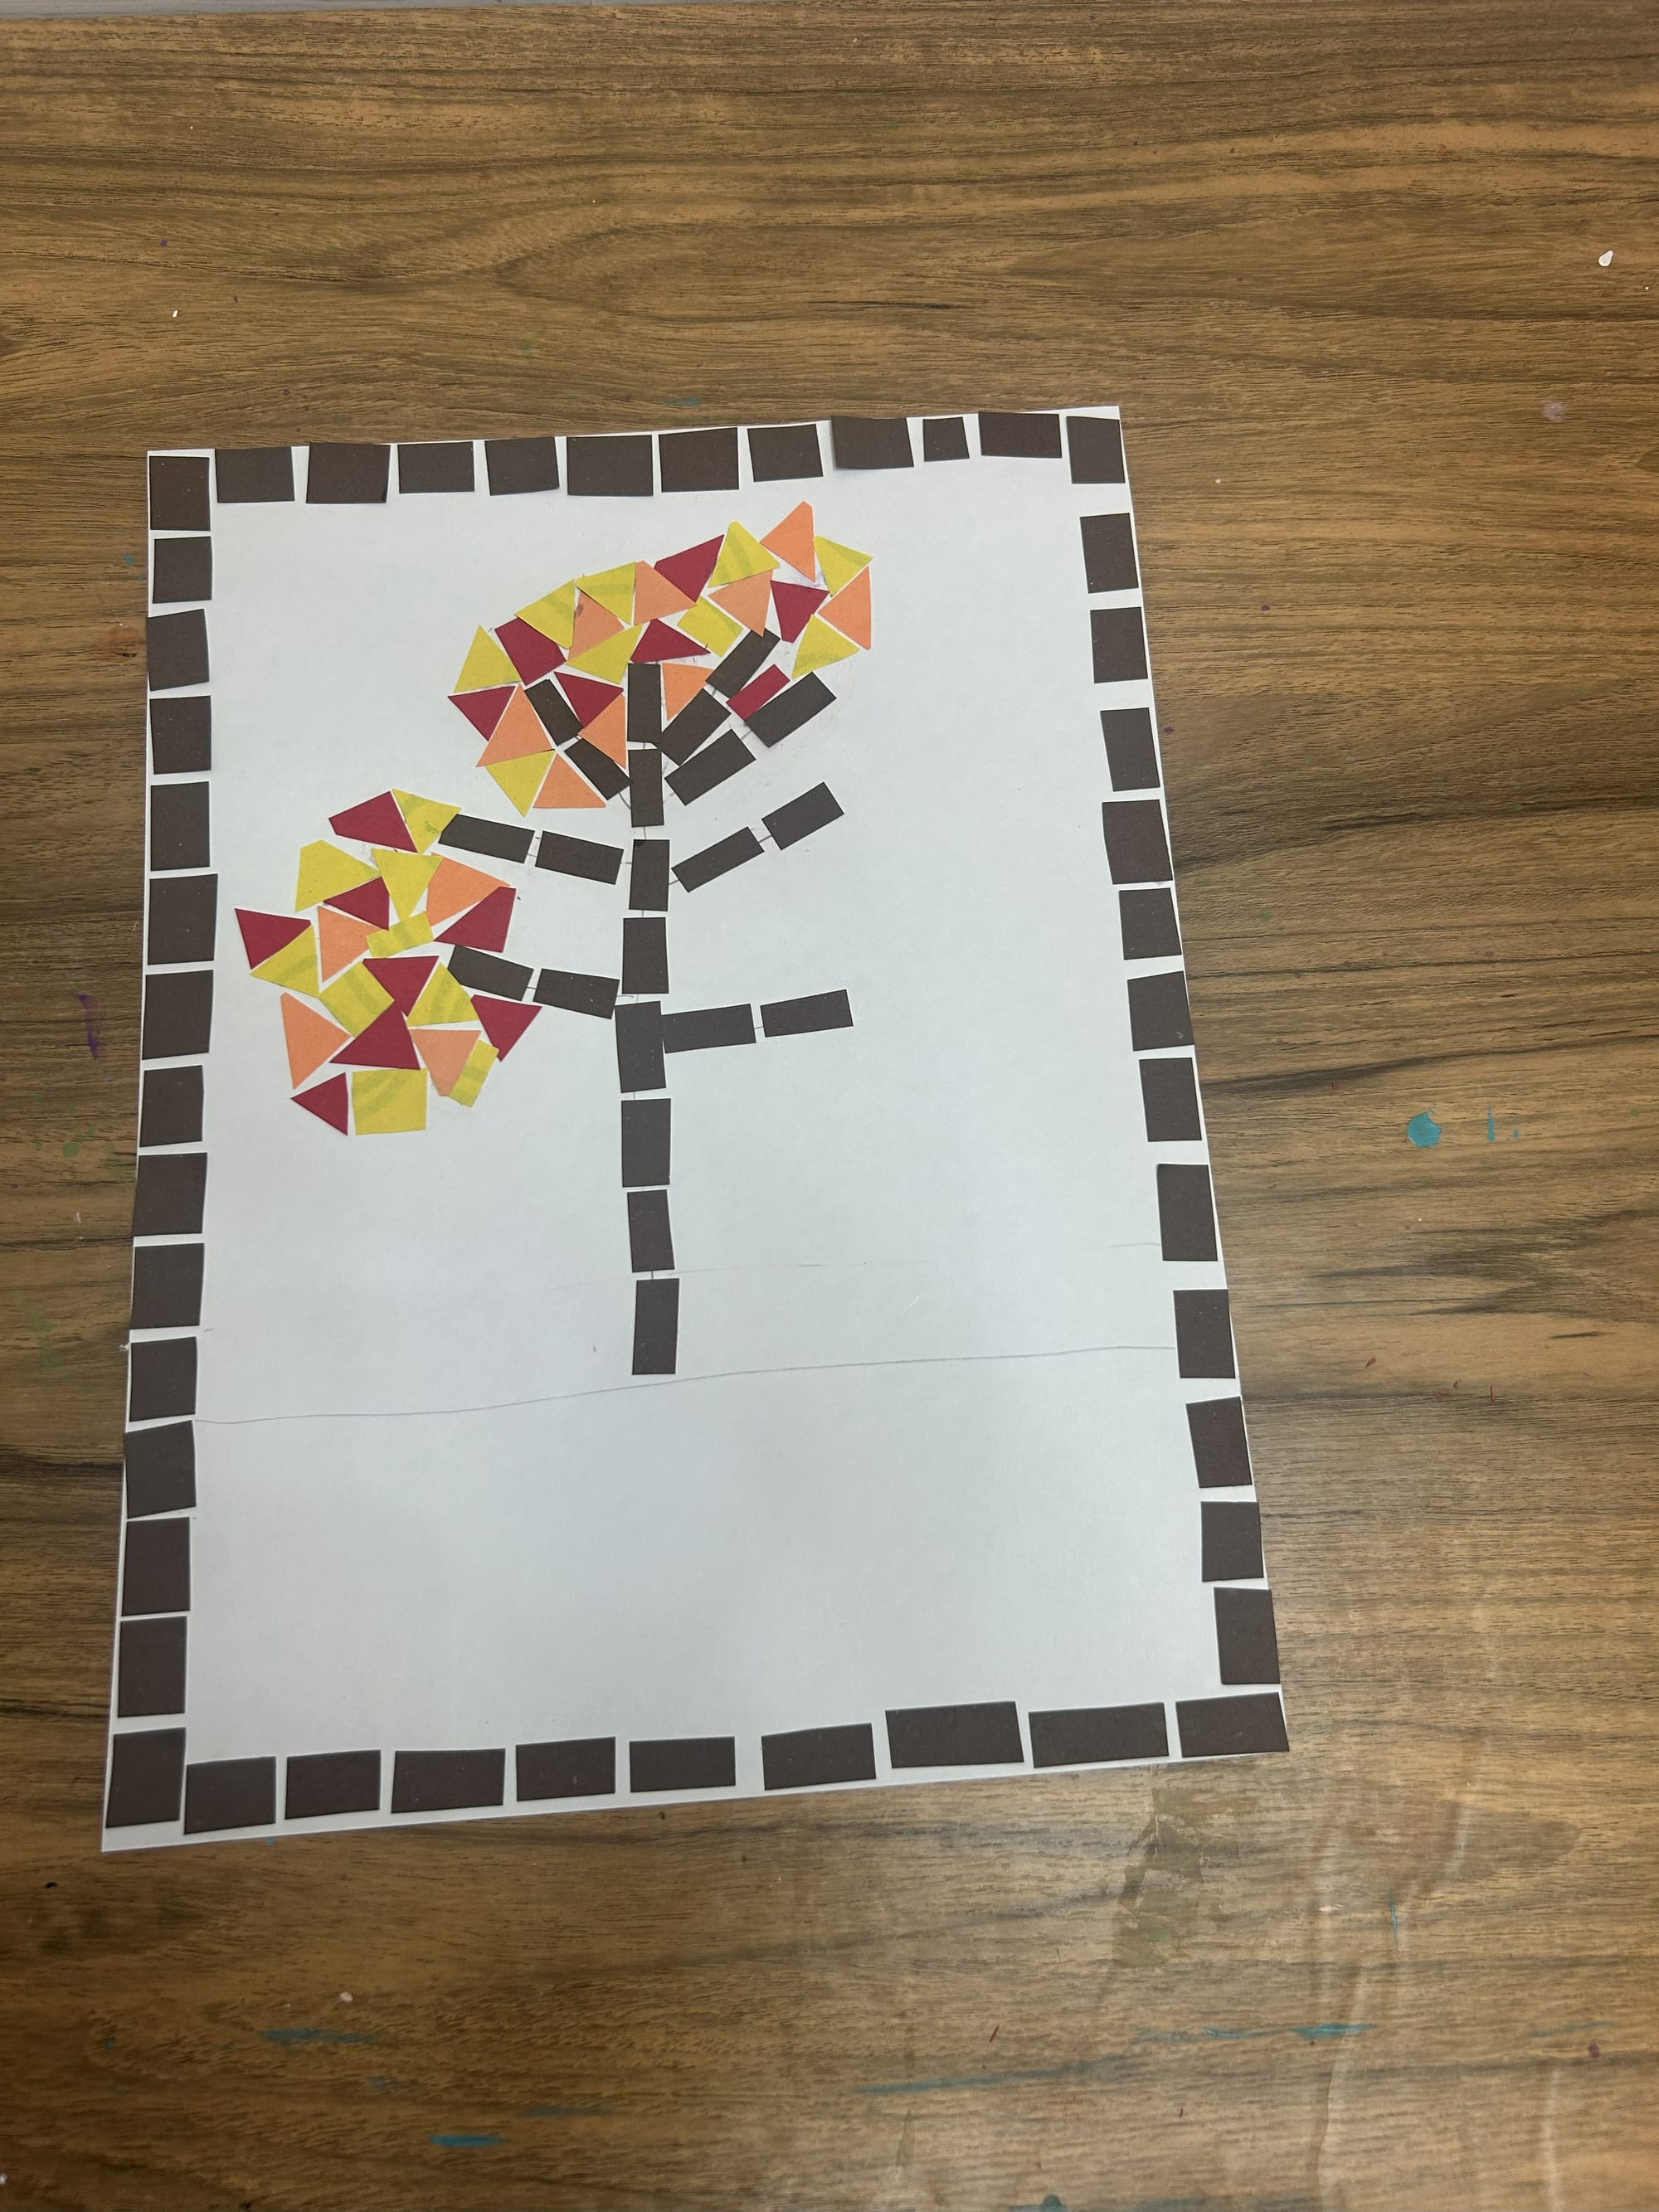
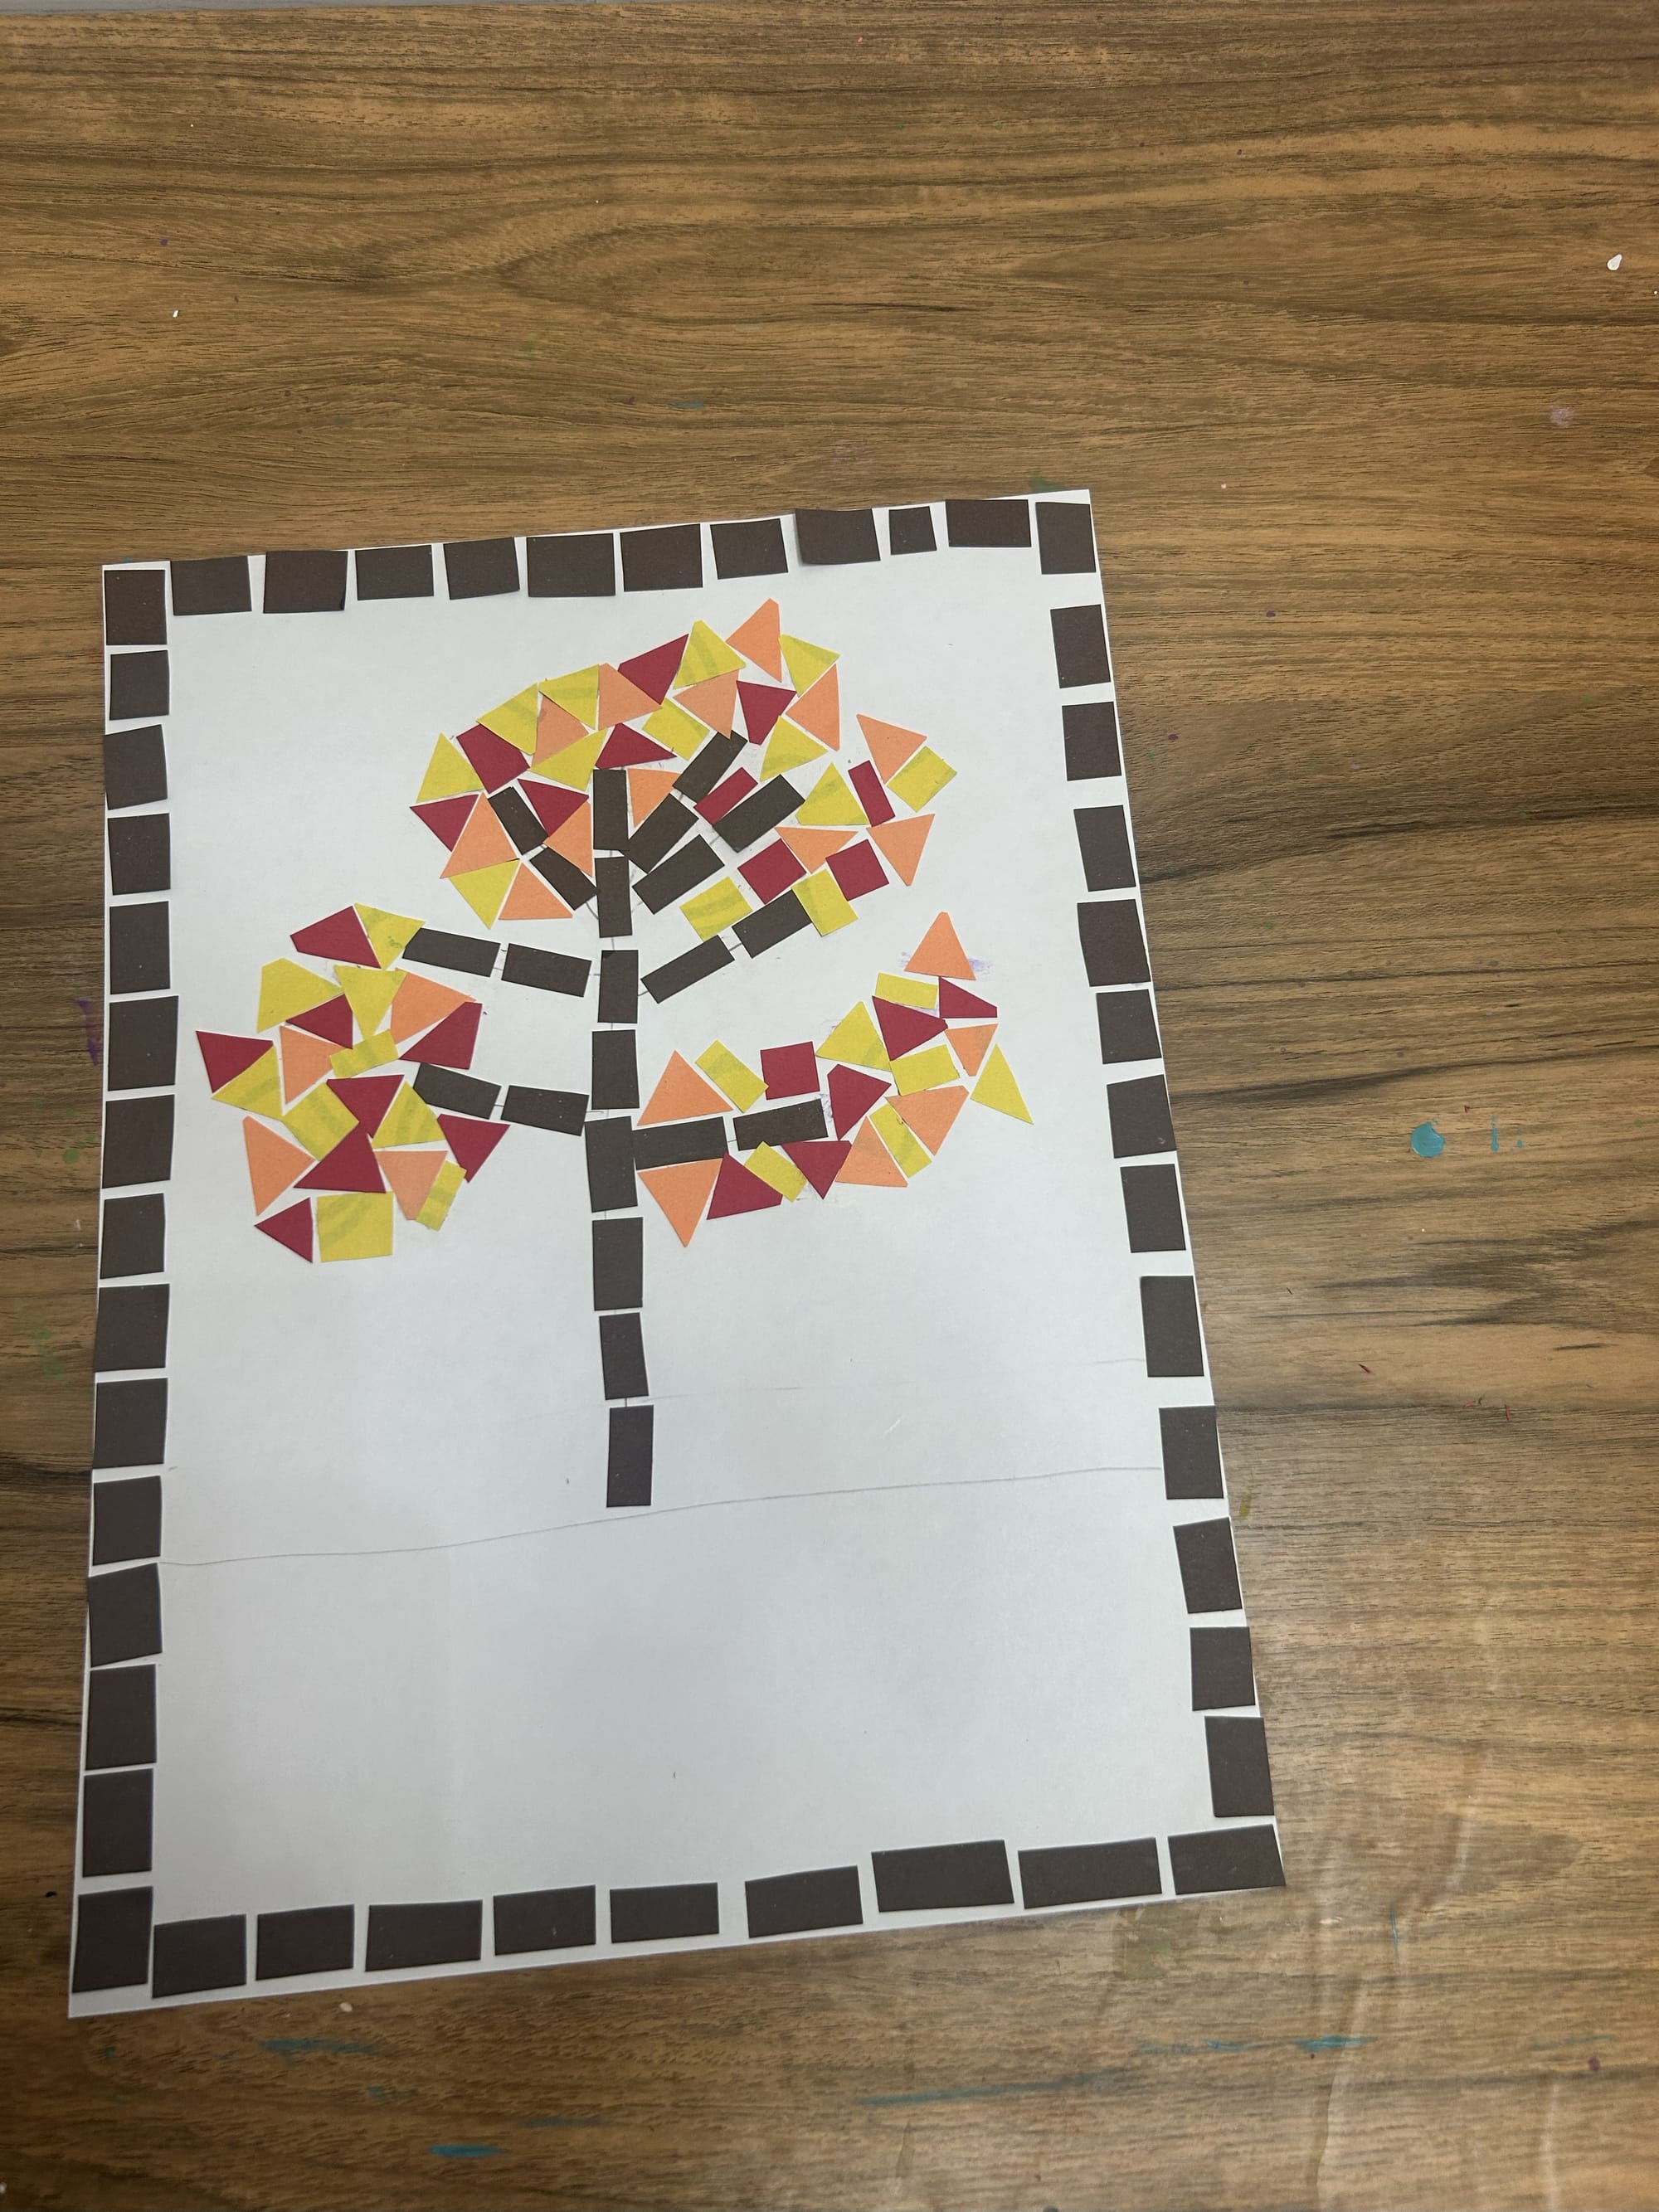
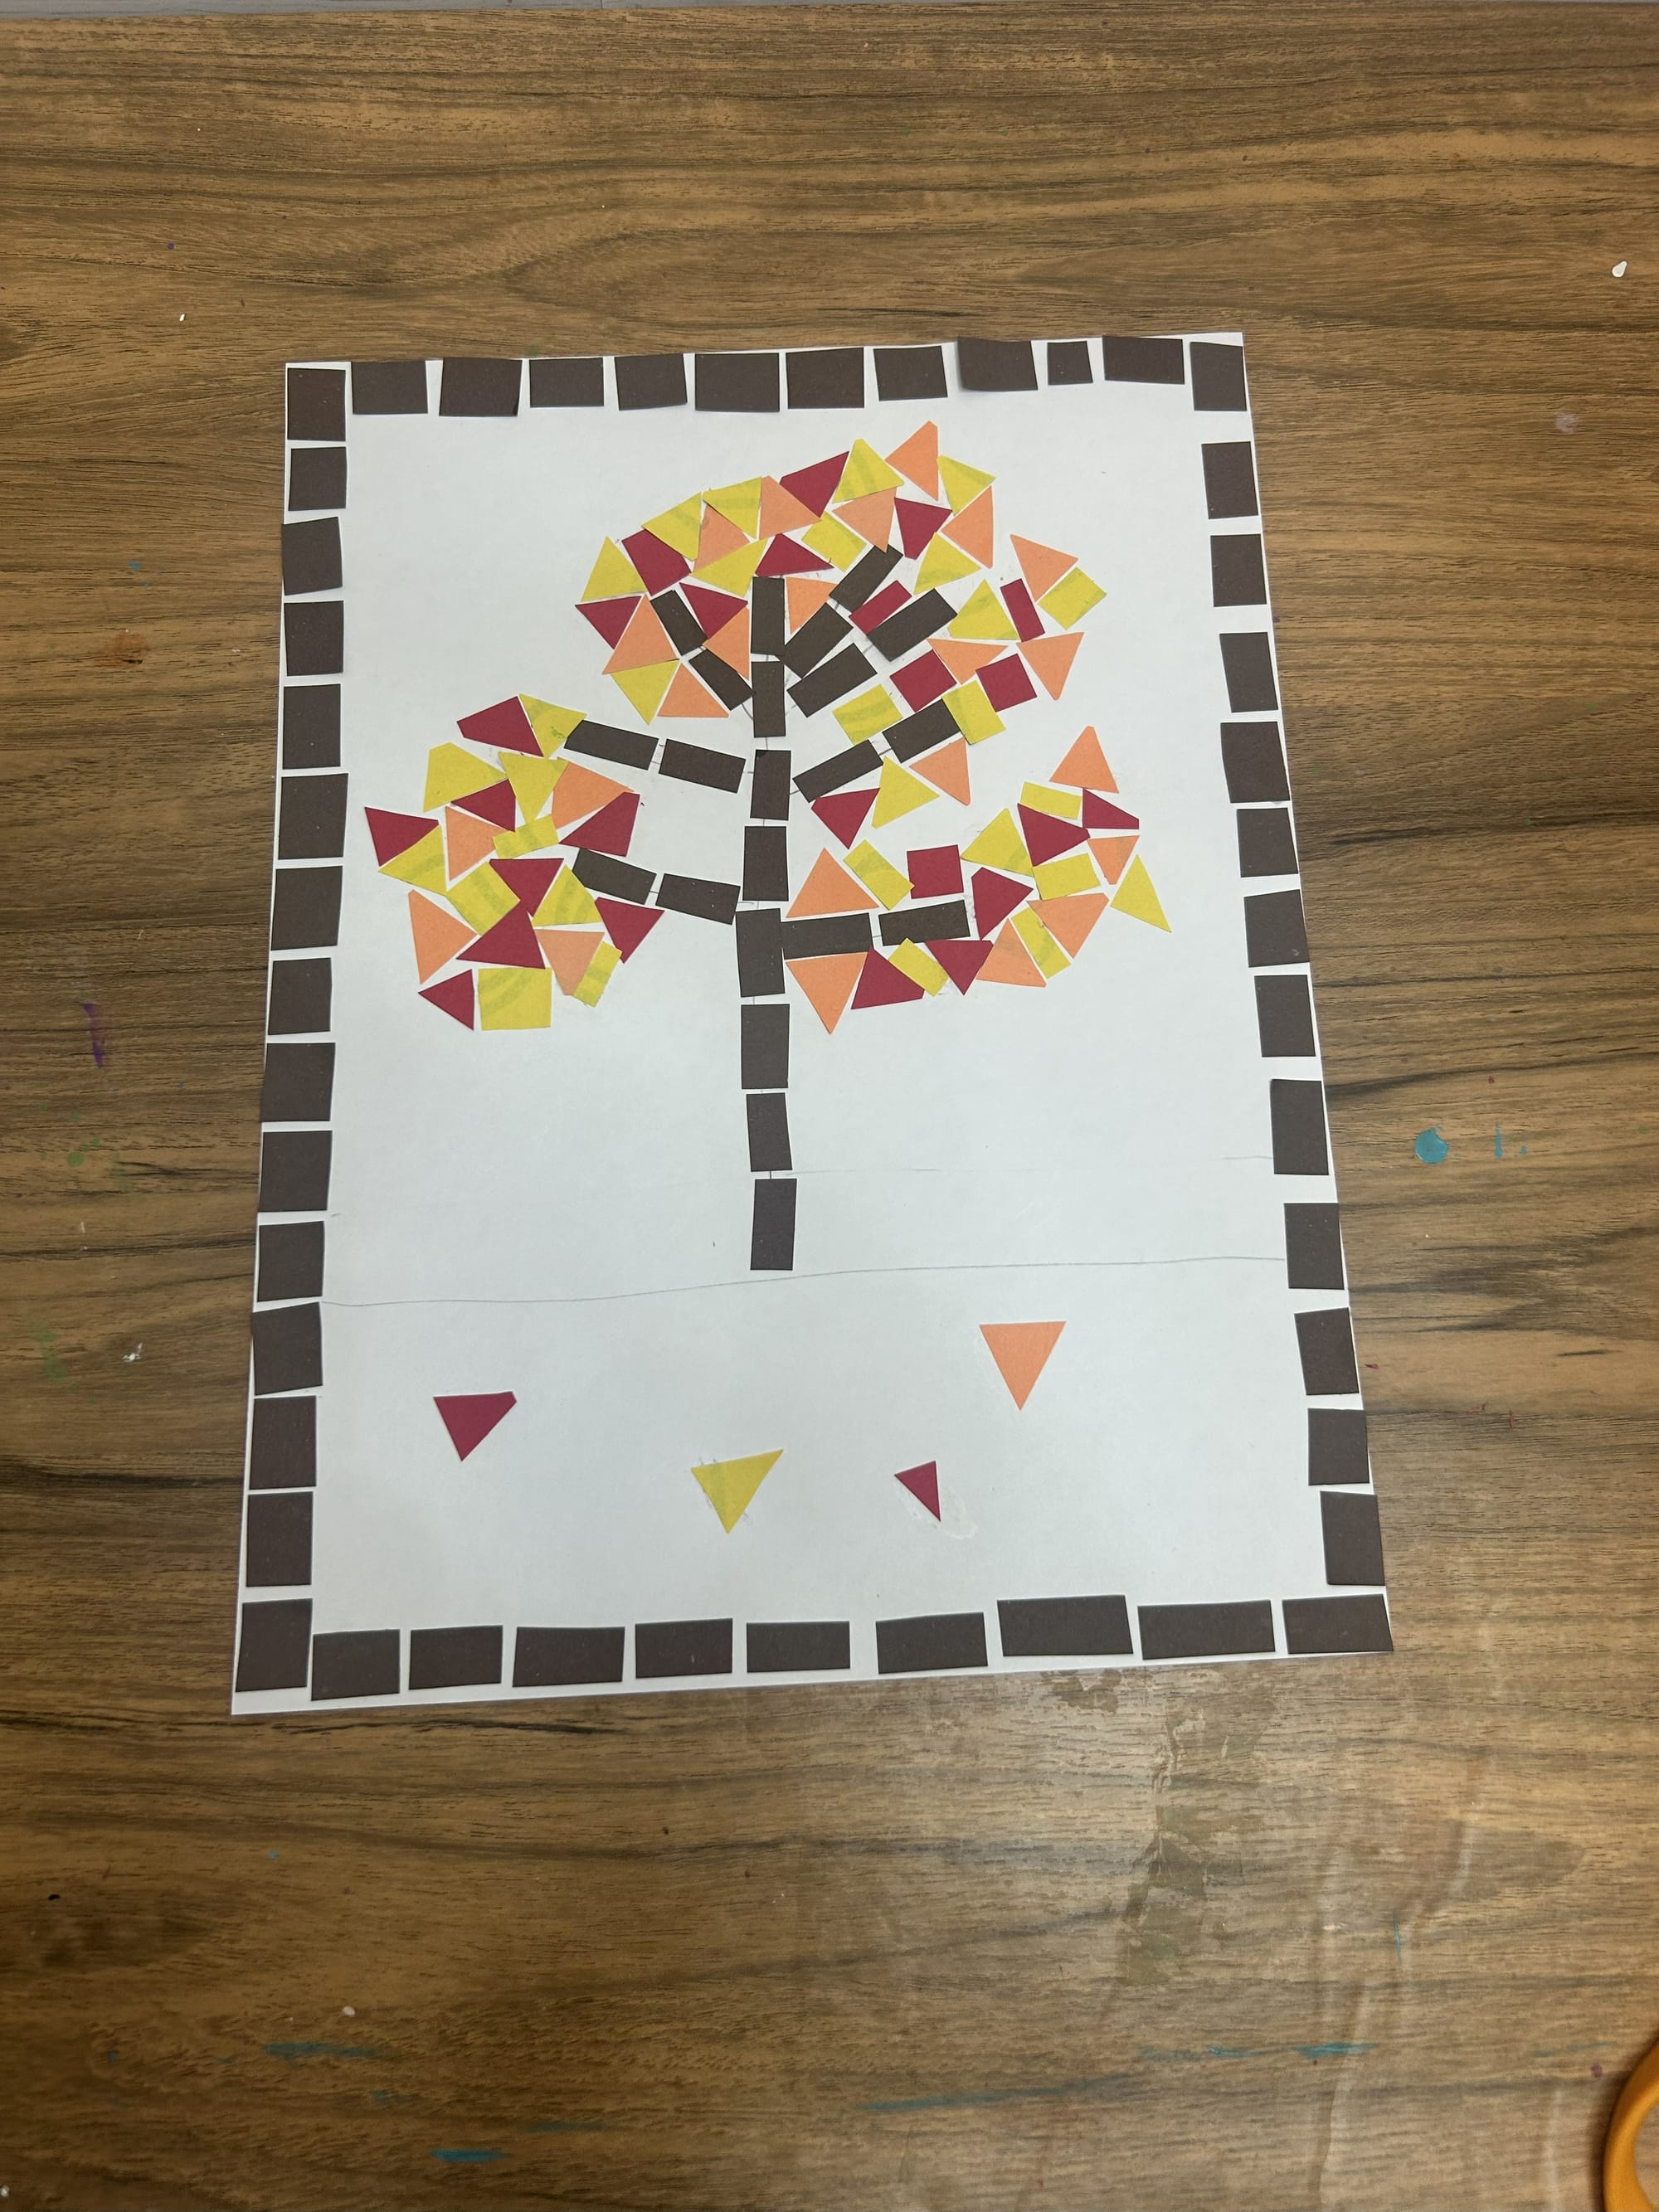
Add pieces of leaf colors to the tree.
Step 6: Add Paper Pieces to Make the Sky and Grass
Add the green pieces to make the grass and blue to create the sky.

Learning Benefits & Extensions
🧠 Educational Benefits
This fall mosaic craft helps develop:
- Fine motor coordination
- Hand-eye coordination
- Creativity and self-expression
- Color recognition
- Focus and patience
📘 Learning Extensions
- Talk about fall colors and seasonal changes
- Count the mosaic pieces used
- Compare warm vs. cool colors
- Pair with a fall read-aloud
- Create a fall art gallery or bulletin board
- Create your own design
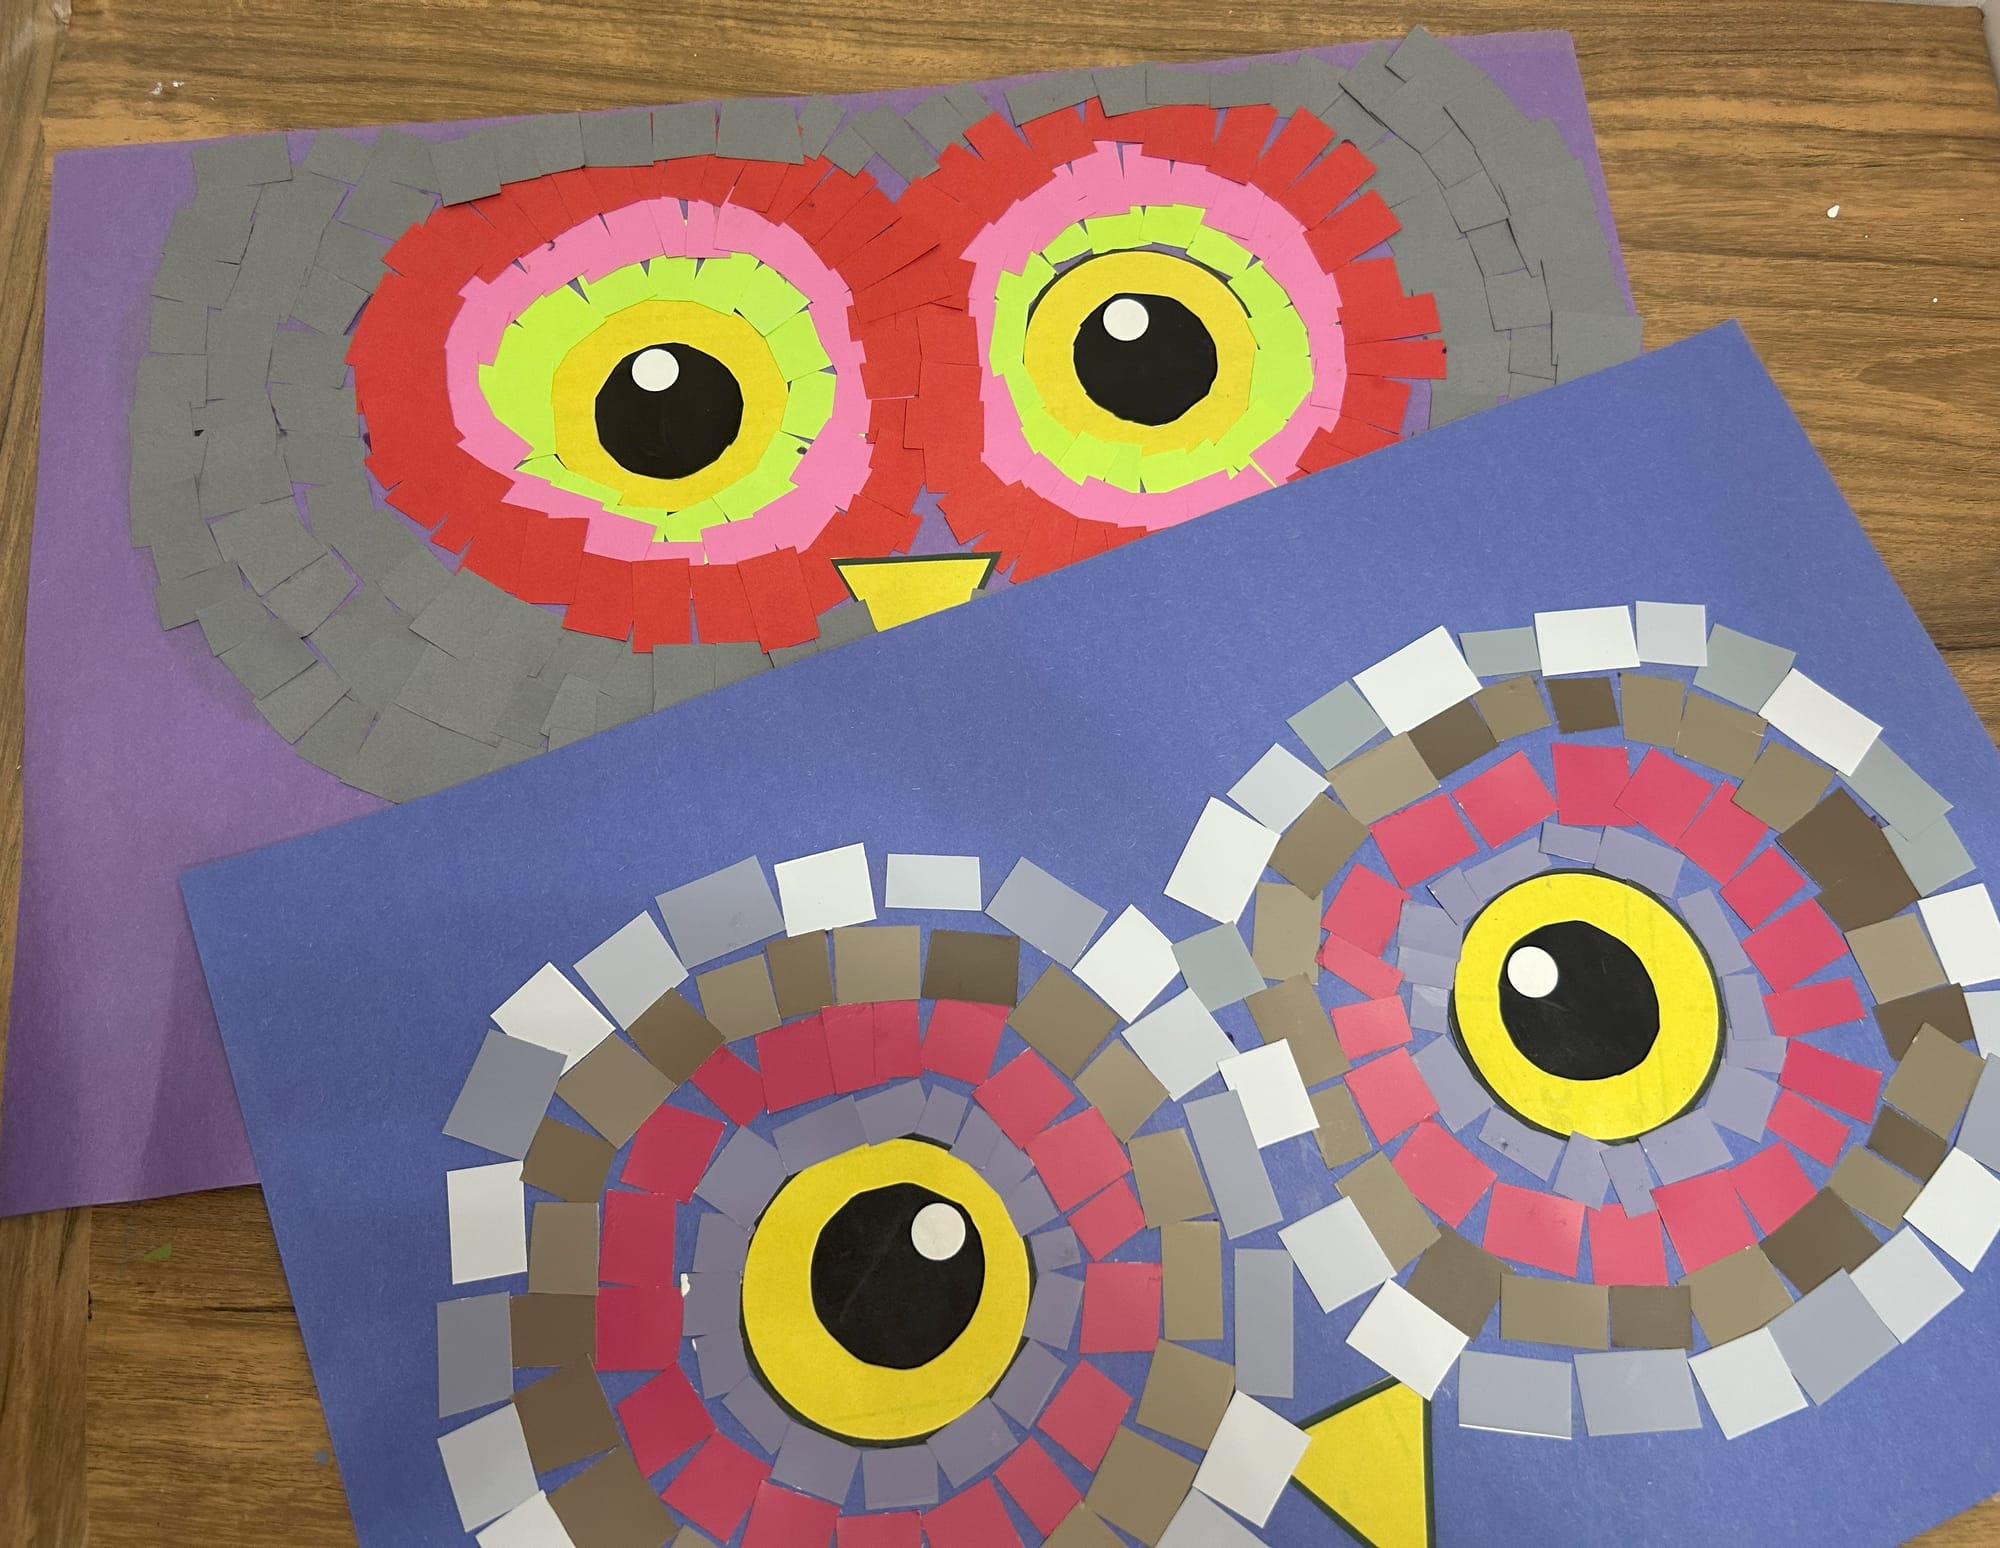
Looking for other Mosaic crafts? Try some other crafts on my page!

Perfect For
- Fall classroom art projects
- Preschool and kindergarten activities
- Elementary art lessons
- Homeschool fall units
- Seasonal bulletin boards
Display Ideas
- Create a fall mosaic bulletin board
- Hang artwork in classroom hallways
- Display at home as seasonal décor
Final Thoughts
This DIY fall mosaic picture craft is an easy and engaging way to bring autumn creativity into your classroom or home. With simple supplies and open-ended design, kids can express themselves while building important developmental skills.
If you’re looking for a fun fall art activity that’s both creative and educational, this mosaic craft is a perfect choice 🍂
If you try this craft, I’d love to see it! Share your creations or save this project for later.
- “Leave a comment with your favorite color combo!”
- “Tag #craftymamabirdnc on Instagram so I can see your Fall Mosaic Design!”